A question that pops up in the LEGO® Train hobby community somewhat frequently is interpreted as follows: "I've amassed a fair collection of LEGO® Train track pieces beyond what comes in the basic train set; how do I know what I can build with it all?" I see a few different ways this question can be answered. Option 1: Do what my engineering professor did when I asked him about a simple printing key-command shortcut, which was to hand me a 2400 page AutoCAD manual and say "Look it up." Alas, the "figure it out yourself" approach isn't very friendly, and may turn some people off from the hobby due to the overwhelming amount of information available about planning model train tracks. Option 2 would be to set up a side business where I design layouts for people based on their track quantities and available space (a common theme of the above question is whether a software exists that will perform this action automatically. No, such software does not exist). However, this would turn play into work for me, and create a pile of client relationships I'd have difficulty maintaining. So, I'm going with Option 3: Demonstrate the fundamentals of planning model train layouts using LEGO® train tracks. My primary source of income is education, so teaching others to design their own layouts seems like the best approach for me to take.
Track Planning at its core is the act of designing your model train layout before you build it, one of my favorite aspects of the hobby. Countless articles and books are available on the subject, but the information is usually aimed at model railroaders in conventional scales. This plethora of planning knowledge can be a bit inaccessible for beginners, especially those working in L gauge, which presents its own unique set of geometric challenges not found in most other scales. Many builders new to the hobby will simply lay out track until they run out of pieces (potentially leaving their idea incomplete) and they may find certain track arrangements don't fit perfectly or can cause derailments. Planning your track beforehand gives you the luxury of making mistakes on paper (or pixels), rather than in the physical world where such errors can be more disheartening than something that simply needs to be erased and re-drawn. Throughout this series, I will be drawing layout plans using two pieces of software. The first is Track Designer, a Windows 95 program written during the 9 Volt era of LEGO® trains, which is not easily found available for download these days. The second is BlueBrick, which is more recently updated and has more advanced features than Track Designer, and is the software I would recommend for anyone seeking LEGO® layout planning software. That said, even if you don't prefer to draw your track plans before you build them, the data I am presenting will still help you come up with functional, creative track plans for your LEGO® train collection.
This will be a multi-part blog series, and to start, we will cover some of the fundamentals of LEGO® Train Track Planning, beginning with... the circle!
This is the simplest layout possible that allows continuous running of a train. A LEGO® train track circle requires 16 curved pieces. For space planning purposes, allow about 30"x30" (76cm x 76cm) or 2.5 feet by 2.5 feet for this most basic circle layout. Well, in actual fact it’s 28.5”x28.5”, but for reasons we shall see later, I am adding a 4-stud border around each layout measurement in this first part of the series. Most LEGO® Train sets will include enough curved track for a circle, and perhaps a few pieces of straight track as well, allowing us to make an oval or a square:
Note that a 90-degree quarter-turn requires four pieces of curved track, and a 180-degree half-turn requires eight pieces of curved track.
Next, let's pick up a box of extra tracks from our nearest LEGO® supplier. This box has eight pieces of straight track, four pieces of curved track, and eight pieces of flex track. For the purposes of this article, we will mostly ignore the flexible track, but it's worth noting that four pieces of flex track can substitute for a straight OR a curve piece.
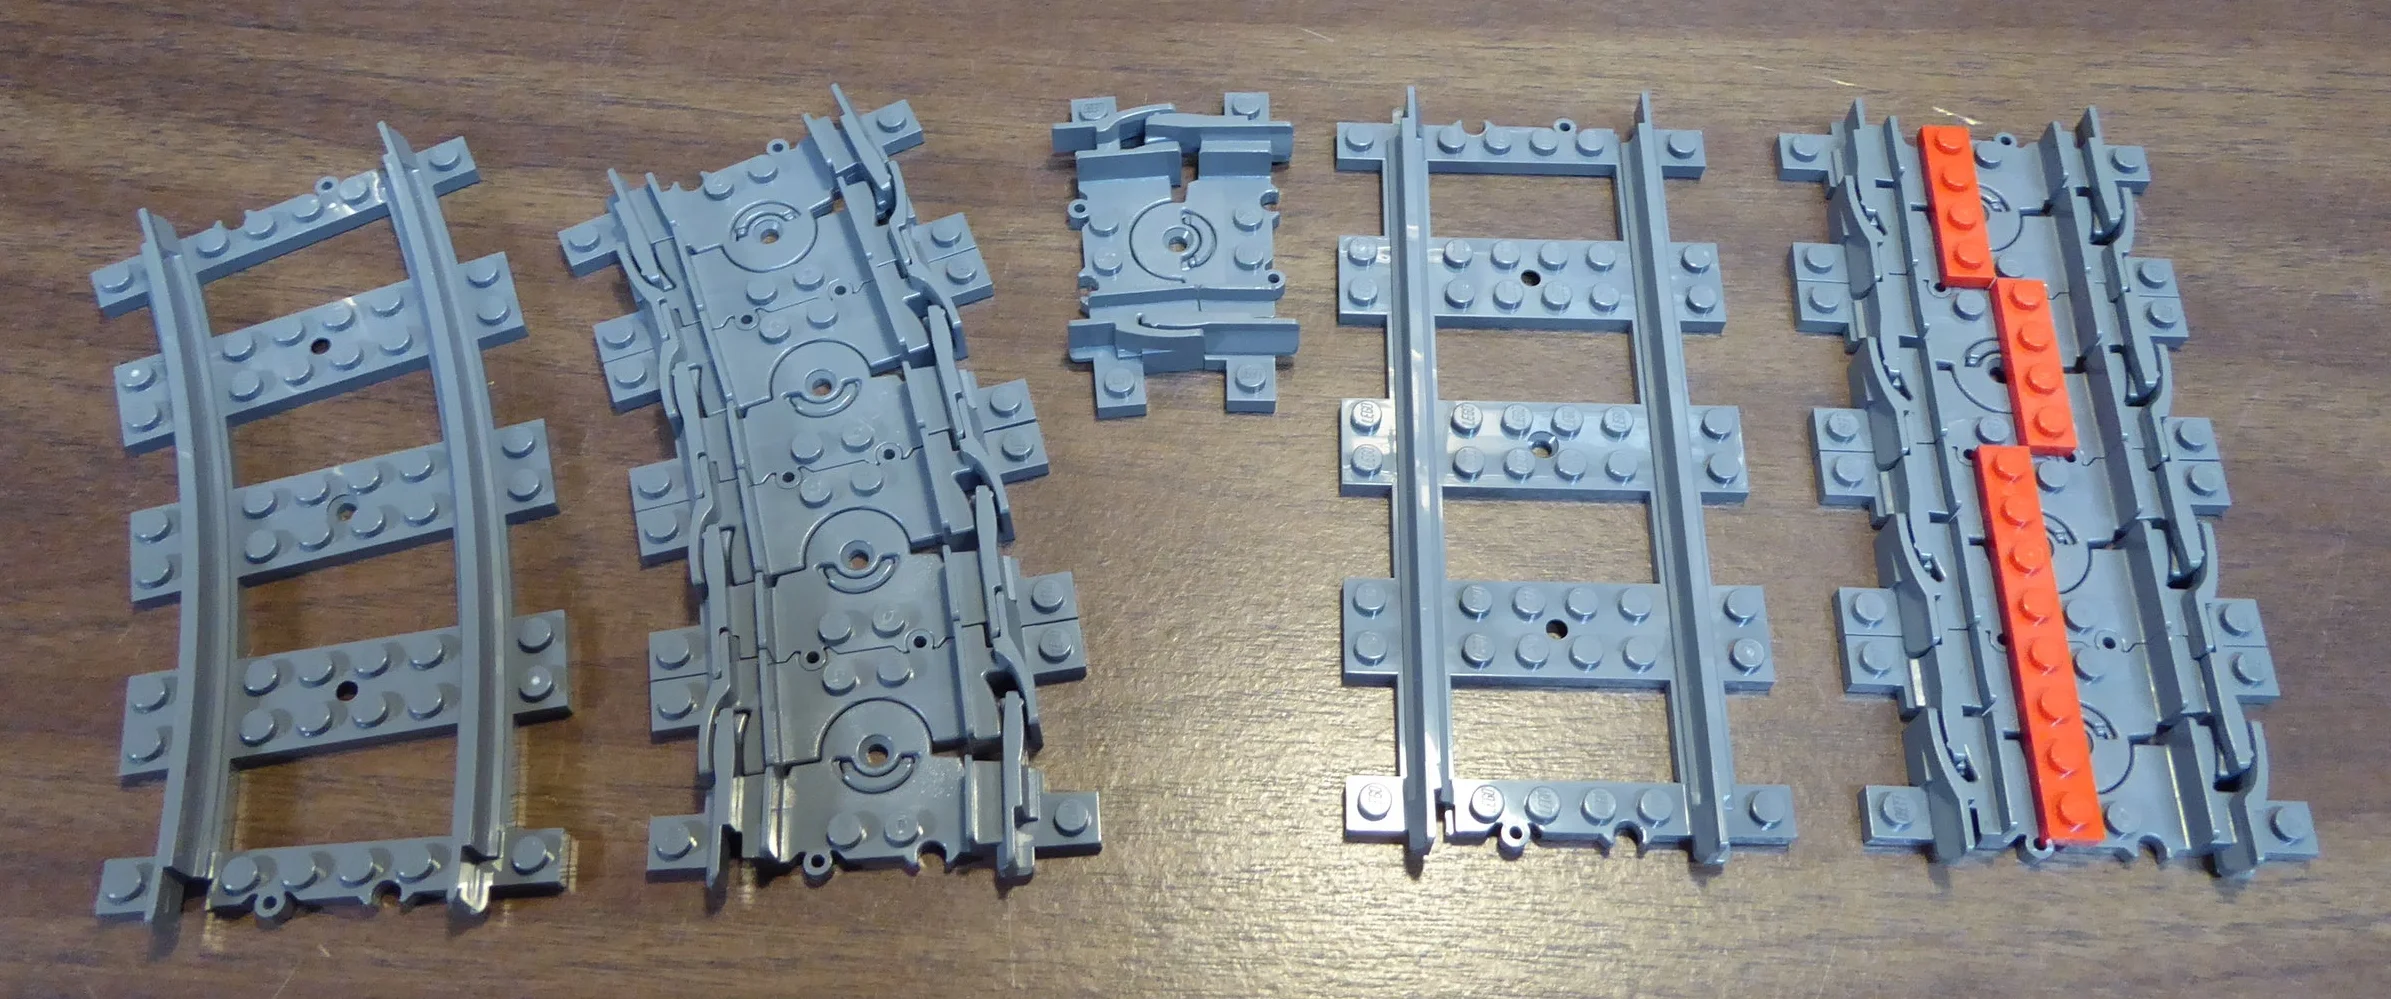
In the center of the picture is one length of flextrack. On the left, we see how four sections of flex track can equal a single piece of curved track. On the right, four sections of flex track equal one straight track as well. The red plates help keep the sections of flex track perfectly straight.
With our extra track, we can now build a much larger oval.
This layout uses 12 pieces of straight track (five each on the long sides and one each on the short sides) and 16 pieces of curved track. The layout covers approximately 35"x55" (89cm x 140cm) of space, and gives us a longer run for our train. That said, it's a bit boring for operations. Once you've stopped your train at the station a few times and run it as fast as possible in circles until it derails or drains the batteries, there's not a whole lot else to do. Enter the switch track! The switch (or”turnout” in some regions) can split one track into two, or merge two tracks into one. Switches are available for purchase in a pair, one right-hand and one left-hand switch. But before we add switches to our layout, let's talk briefly about the two types of side-tracks we can create with switches.

One may assume that the main line track continues beyond the green squiggles at either end.
On the left is a passing siding, (or “passing loop” in some regions). This siding has a switch at each end, allowing a train to enter and exit the side track traveling in one direction. It is called a "passing" siding because it is typically found on at a point where two trains must pass one another. For instance, we could park our freight train heading to the left in the siding, close the switches, and wait for the passenger train heading to the right to go by on the main track. Then we can open the switches and our freight train can re-enter the mainline and continue to the left. We may also use this siding to park our freight cars and run the engine around to pull the train from the opposite end, a technique that will be studied in further detail another time.
On the right is a stub-end siding; a train may only enter from one end, and then must reverse to return to the main track. This type of siding is typically used to park freight cars for storage, or for loading and unloading at an industrial site. The crane of set 60052 or the container forklift of set 60198 comes to mind.
*NOTE* LEGO® Train switches are spring-style switches. This means that a train coming towards the rightmost switch from the right of the above image (on either the main track or stub-end side track) is able to go through the switch regardless of which direction the switch points are set for. On the other hand, a train traveling in that same direction heading towards the middle switch will be forced onto the route for which the points are set (the direction of the switch can be changed by flipping the yellow lever). Also note that if you are using the older, metal-rail 9 Volt tracks, the switches are power-routing. Both outside rails of the switch will always be powered, but the inside rail of the route the switch is NOT set for will NOT have power, which means your 9V motor will remain stationary until you throw the switch.
Let's look at a few of layouts that use one or both of these siding types.
Each of these layouts uses nearly all the track in our collection so far: 16 pieces of curved track, plus one curved track per switch (this allows our diverging route to line up parallel to the main route) and all 12 pieces of straight track (11 on the right-hand layout). So now we have some more operational interest; we can deliver freight cars to the industries at each siding on the left layout, or we could drop off and pick up a freight car on the passing siding on the right layout. However, we're still a bit limited in our abilities; we can't park an entire freight train on the passing siding on the right layout, and if we want to service both sidings on the left layout, we either need to run our train with the engine in the middle of the freight cars, or run the engine all the way around the layout to get to the other end of the train, neither of which are entirely realistic. So, let's drop by our local LEGO® supplier again, and pick up another box of straight and flexible tracks, as well as 2-pack of extra switches. (Note: if you would like to buy single switches, or just straight track without the extra curves and flex pieces, you can find Lego track for sale on websites like Bricklink, Brickowl, or eBay.

This layout shows 21 pieces of straight track, but so far we only have 20. We can use our flexible tracks to substitute for that extra piece of straight track.
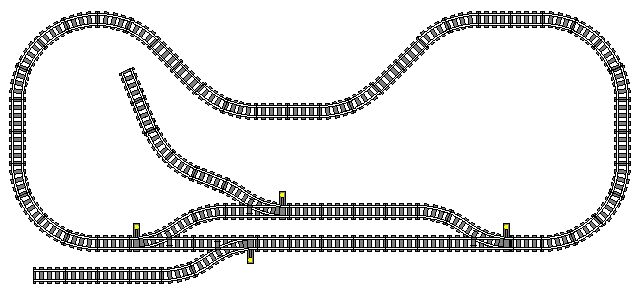
Now we have a layout with some genuine operational interest: A large circle to run our train, a passing siding where we can park a second train, and two sidings where we can deliver and pick up our freight cars. We'll cover operations more thoroughly in another installment of this blog, but for now, let's try out some different layout shapes besides the basic oval. We'll temporarily throw out our track count for the sake of demonstrating the different shapes and options. Click on each layout to see a brief description of its features.


There are other shapes and styles of layouts available to model railroaders, but due to the limited track geometry of LEGO® trains, these options will be covered in another part of this series. We have also focused only on single-track mainline layouts so far, meaning that there is only one route for trains to take to traverse our tracks. Future installments of this blog will cover multi-track layouts and how to operate your trains realistically. To close this first section, we will look at a couple of classic layout shapes designed by the LEGO® company themselves!
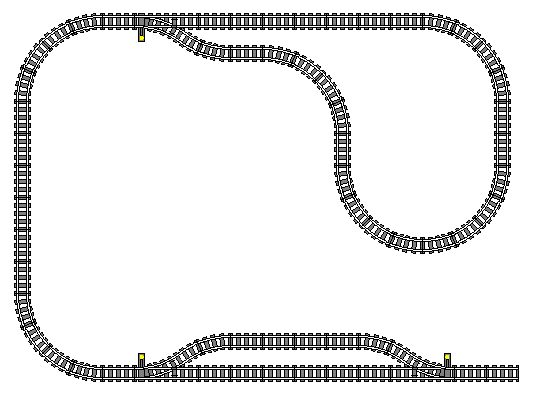
In the 9 volt era, one could purchase additional boxes of only curved track, as well as boxes of only straight track or switches, but there was more: The LEGO® Company offered "Kits," or packs of extra tracks sold at a slight discount. For example, there was K4531, which added three boxes of straights (24 pieces), two boxes of curves (16 pieces) and two packs of switches (2 left, 2 right, and 4 curved tracks) to the basic oval offered with most sets (16 curved pieces), all of which added together meant that you could build this layout:
The enormous passing loop on the left hand side gives us two route options; a train traveling to the left at the top of the plan may go straight through the switch for a short route, or go through the diverging side and travel the long way around the whole of the layout. Also note the two stub-end sidings; the one on the left is long enough to hold an entire train!
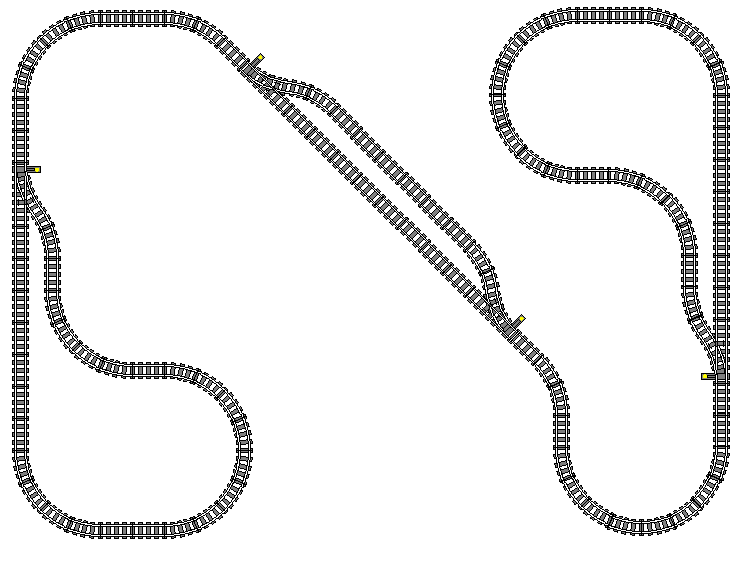
This layout was a personal favorite of mine in my early days of LEGO® trains, as it was a pretty big layout to a kid. In fact, there was only one "kit" of tracks available to make a larger layout, and that was K4548. In addition to your basic 16-curved-section oval, this kit added SIX switches, FORTY-SIX curved tracks, and a whopping SIXTY FOUR straight tracks to create this nine by seven (2.74m by 2.13m) foot layout:
This layout is packed with operational interest: two stub-end sidings, a passing loop in the lower left, and a very long passing loop (which could be considered an alternate mainline route) stretching from the switch at the upper right of the plan, to the switch at the lower right, going around the left side of the layout.
The second installment of this blog series covers the geometric properties of LEGO® Train tracks, as well as double-track railroads and related layout planning elements. If you would like to be notified when future installments of this blog are posted, please follow my Facebook page or Instagram feed. Thanks for reading, and happy layout building!