

Debug Card - PC Diagnostics
Debug Card - PC Diagnostics
Debug Card - PC Diagnostics

You also want an ePaper? Increase the reach of your titles
YUMPU automatically turns print PDFs into web optimized ePapers that Google loves.
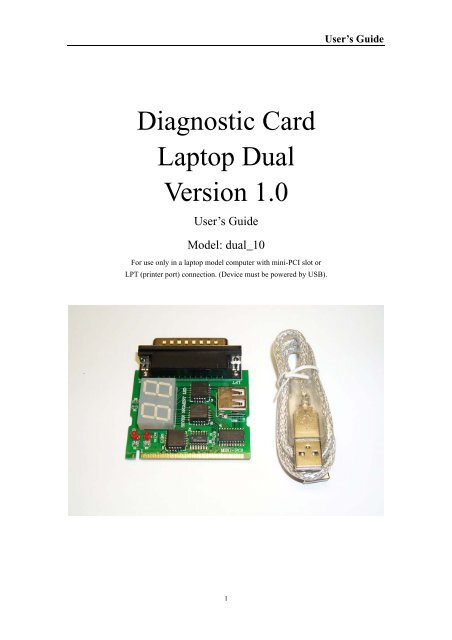
Diagnostic <strong>Card</strong><br />
Laptop Dual<br />
Version 1.0<br />
User’s Guide<br />
Model: dual_10<br />
For use only in a laptop model computer with mini-<strong>PC</strong>I slot or<br />
LPT (printer port) connection. (Device must be powered by USB).<br />
1<br />
User’s Guide
INTRODUCTION<br />
User’s Guide<br />
The Dual Notebook Diagnostic <strong>Card</strong> is a powerful diagnostic tool for technicians and<br />
administrators to troubleshoot various problems of notebook <strong>PC</strong> PII/III/ P4 by using a mini-<strong>PC</strong>I<br />
and LPT (printer port) Bus. It is easy to install, yet extremely powerful to use. With this card in<br />
hand, you no longer have to go through tedious and time consuming process of trying to figure out<br />
what is wrong with your hardware. Notebook Diagnostic <strong>Card</strong> will indicate exactly what is wrong<br />
with your notebook in just seconds. It saves your time and money.<br />
Our new and improved design of Diagnostic <strong>Card</strong>, it can work with almost all popular types of<br />
CPUs, Motherboards, and BIOS.<br />
All though we try, it is not possible to update this manual every time a new motherboard is made by<br />
the manufactures. It is always advised to visit the bios manufacture website, and download the<br />
latest codes per bios revision. Or visit bioscentral.com for an online reference.<br />
System Requirements<br />
The Dual Notebook Diagnostic <strong>Card</strong> itself only requires an empty mini-<strong>PC</strong>I slot or LPT port<br />
connection. It is not necessary to install memory chips to perform analysis. “POST Codes” can be<br />
displayed through the hexadecimal display panel.<br />
Tech Support<br />
� Tech Support support@pc-diagnostics.com<br />
Dual Notebook Diagnostic <strong>Card</strong> INDICATORS<br />
‘Indicators’ are any light emitting diodes (LED) or hexadecimal display panel is mounted on<br />
extended cable. This section discusses the following indicators that appear on the Notebook<br />
Diagnostic <strong>Card</strong>:<br />
POST Code Display<br />
� Dual Notebook mini-<strong>PC</strong>I & LPT Printer Port Bus <strong>Card</strong><br />
The POST Code Display is made up of a dual, dot matrix hexadecimal read-out that displays Power<br />
On Self Test (POST) status codes.<br />
2
Power On Self-Test (POST) Codes<br />
User’s Guide<br />
This card can test the AMI/AWARD/PHOENIX BIOS, while it can be used in widely model of<br />
notebook. During system booting up, this card displays can show the post codes. Refer to Appendix<br />
A, it shows almost POST codes provided by BIOS manufacturers.<br />
<strong>PC</strong>I Signal Definition:<br />
CLK Motherboard Clock Signal. Should be on when power is supplied to the<br />
motherboard even without CPU.<br />
+3.3 Motherboard Clock Signal. Should be on when power 3.3V is supplied to<br />
the motherboard even without CPU.<br />
INSTALLING Dual Notebook Diagnostic <strong>Card</strong><br />
Installation Procedure<br />
TO INSTALL A Diagnostic <strong>Card</strong>:<br />
1) Install the Notebook Diagnostic <strong>Card</strong> in mini-<strong>PC</strong>I slot or LPT Printer Port<br />
2) Power on the machine and monitor the code shown on LED<br />
3) When using the LPT printer mode, USB cable must be used to supply power to <strong>PC</strong> Diagnostic<br />
card. USB cable not required when using mini-<strong>PC</strong>I slot mode.<br />
3
POST Codes<br />
User’s Guide<br />
When the machine is turned on, the hexadecimal display should show the various POST codes<br />
(Post 80H + 84H) as the system executes (unless it has a rare BIOS that does not display POST<br />
codes).<br />
If the machine does not boot, system POST has detected a fatal fault and stopped. The number<br />
showing in the hexadecimal display on the Notebook Diagnostic <strong>Card</strong> is the number of the test in<br />
which POST failed. Refer to Appendix A for a listing of POST codes.<br />
Troubleshooting During POST<br />
After initial power up, Power-On Self-Test (POST) codes begin displaying on the Notebook<br />
Diagnostic <strong>Card</strong>’s hexadecimal displays (for most machines).<br />
NOTE: A few machines use the parallel port to display POST codes instead of the Diagnostic<br />
<strong>Card</strong>.<br />
THE POST PROCESS<br />
The ROM built onto the motherboard of the computer rums its built-in POST (Power-On Self-Test)<br />
when you switch power on to the computer, press the reset button on the computer, or press<br />
Ctrl-Alt-Del (warm boot). POST performs a tightly interwoven initialization and testing process for<br />
each of these methods, but it typically does not test or initialize memory above 64K for warm boot.<br />
You can get an even better idea of the detailed process by studying the POST code listings in<br />
Appendix A.<br />
4
Error Code<br />
C0 Turn Off Chipset Cache<br />
01 Processor Test 1<br />
02 Processor Test 2<br />
03 Initialize Chips<br />
04 Test Memory Refresh Toggle<br />
05 Blank video,Initialize keyboard<br />
06 Reserved<br />
07 Test CMOS Interface and Battery Status<br />
BE Chipset Default Initialization<br />
C1 Memory Presence test<br />
C5 Early Shadow<br />
C6 Cache Presence test<br />
08 Setup low memory<br />
09 Early Cache Initialization<br />
0A Setup Interrupt Vector Table<br />
0B Test CMOS RAM Checksum<br />
0C Initialize Keyboard<br />
0D Initialize Video Interface<br />
0E Test Video Memory<br />
0F Test DMA Controller 0<br />
10 Test DMA Controller 1<br />
11 Test DMA Page Registers<br />
12~13 Reserved<br />
14 Test Timer Counter 2<br />
15 Test 8259-1 Mask Bits<br />
16 Test 8259-2 Mask Bits<br />
17 Test Stuck 8259’s interrupt bits<br />
18 Test 8259 Interrupt Functionality<br />
19 Test stuck NMI Bits Parity/IO check<br />
1A Display CPU Clock<br />
1B-1E Reserved<br />
1F Set EISA Mode<br />
20 Enable Slot 0<br />
21-2F Enable Slots 1-15<br />
30 Size Base and Extended Memory<br />
31 Test Base and Extended Memory<br />
32 Test EISA Extended Memory<br />
33-3B Reserved<br />
3C Setup Enabled<br />
Award (Edition: ELITEBIOS 4.51PG)<br />
5<br />
Appendix A
3D Initialize &Install Mouse<br />
3E Setup Cache Controller<br />
3F Reserved<br />
BF Chipset Initialization<br />
40 Display virus protect disable or enable<br />
41 Initialize Floppy Drive & Controller<br />
42 Initialize Hard Drive &Controller<br />
43 Detect & Initialize Serial/Parallel Ports<br />
44 Reserved<br />
45 Detect & Initialize Math Coprocessor<br />
46 Reserved<br />
47 Reserved<br />
48-4D Reserved<br />
4E Manufacturing POST loop or display message<br />
4F Security Check<br />
50 Write CMOS<br />
51 Pre-boot Enable<br />
52 Initialize Option ROMs<br />
53 Initialize Time Value<br />
60 Setup Virus Protect<br />
61 Set Boot Speed<br />
62 Setup Numlock<br />
63 Boot Attempt<br />
BO Spurious<br />
B1 Unclaimed NMI<br />
E1-EF Bios Setup Page<br />
FF BOOT UP<br />
Appendix A<br />
Error Code<br />
AMIBIOS Edition ( 071596)<br />
D0 NMI is Disabled.CPU ID saved. Init code Checksum verification starting<br />
D1 To do DMA init ,Keyboard controller BAT test ,start memory refresh and going<br />
to 4GB flat mode<br />
D3 To start Memory sizing<br />
D4 To comeback to real mode . Execute OEM patch. Set stack<br />
D5 E000 ROM enabled . Init code is copied to segment 0 and control to be transferred<br />
to segment 0.<br />
D6 Control point is in segment 0.To check key and verify main<br />
BIOS<br />
Checksum. If eitheris pressed or main BIOS checksum is bad<br />
Go to check point E0 else goto check point D7<br />
D7 To pass control point to Interface Module.<br />
D8 Main BIOS runtime code is to be decompressed.<br />
D9 Control to be passed to main BIOS in shadow RAM<br />
6
Appendix A<br />
E0 On Board Floppy Controller (if any)is initialized. To start base 512K memory test<br />
E1 To initialize interrupt vector table<br />
E2 To initialize DMA and interrupt controllers<br />
E6 To enable floppy and timer IRQ,enable internal cache<br />
ED Initialize floppy drive.<br />
EE Start looking for a diskette in drive A: and read 1 st sector of the diskette<br />
EF Floppy read error<br />
F0 Start searching ‘MIBOOT.ROM’ file in root directory<br />
F1 ‘AMIBOOT.ROM’ file not present in root directory.<br />
F2 Start reading FAT table and analyze FAT to find the clusters occupied by<br />
‘AMIBOOT.ROM’ file<br />
F3 Start reading ‘MIBOOT.ROM’file cluster by cluster.<br />
F4 AMIBOOT.ROM’ file not of proper size<br />
F5 Disable internal cache<br />
FB Detect Flash type present.<br />
FC Erase Flash<br />
FD Program Flash<br />
FF Flash program successful.BIOS is going to restart<br />
In F000 Memory Address for a real time code<br />
03 NMI is Disabled . To check soft reset /power-on<br />
05 BIOS stack set . Going to disable Cache if any.<br />
06 POST code to be uncompressed.<br />
07 CPU init and CPU data area init to be done.<br />
08 CMOS checksum calculation to be done next.<br />
0B Any initialization before keyboard BAT to be done next<br />
0C KB controller I/B free. To issue the BAT command to keyboard controller.<br />
0E Any initialization after KB controller BAT to be done next.<br />
0F Key board command byte to be written.<br />
10 Going to issue Pin-23,24 blocking/unblocking command.<br />
11 Going to check pressing of , key during power-on<br />
12 To init CMOS if “Init CMOS in every boot ” is set or key is pressed.<br />
Going to disable DMA and Interrupt controllers<br />
13 Video display is disabled port-B is initialized. Chipset init about to begin<br />
14 8254 timer test about to start<br />
19 About to start memory refresh test<br />
1A Memory Refresh line is toggling .Going to check 15us ON/OFF time<br />
23 To read 8042 input and disable Megakey Green <strong>PC</strong> feature .Make BIOS segment<br />
able to write<br />
24 To do any setup before Int vector init<br />
7
Appendix A<br />
25 Interrupt vector initialization about to begin. To clear password if necessary<br />
27 Any initialization before setting video mode to be done .<br />
28 Going for monochrome mode and color mode setting.<br />
2A Different BUSes init (system,static,output devices)to start if present.(please see<br />
appendix for details of defferent BUSes).<br />
2B To give control for any setup required before optional video ROM check.<br />
2C To look for optional video ROM and give control.<br />
2D To give control to do any processing after video ROM returns control<br />
2E IF ega/vga not found then do display memory R/W test.<br />
2F Ega/vga not found .Display memory R/W test about to begin.<br />
30 Display memory R/W test passed. About to look for the retrace checking.<br />
31 Display memory R/W test or retrace checking failed. To do alternate Display<br />
memory R/W test.<br />
32 Alternate Display memory R/W test passed. To look for the alternate display<br />
retrace checking<br />
34 Video display checking over .Display mode to be set next.<br />
37 Display mode set . Going to display the power on message.<br />
38 Different BUSes init (input,IPL,general devices) to start if present.(please see<br />
Appendix for details of different BUSes)<br />
39 Display different BUSes initialization error messages.(Please see appendix for<br />
details of different BUSes).<br />
3A New cursor position read and saved. To display the Hit message.<br />
40 To prepare the descriptor tables<br />
42 To enter in virtual mode for memory test.<br />
43 To enable interrupts for diagnostics mode.<br />
44 To initialize data to check memory wrap around at 0:0<br />
45 Data initialized. Going to check for memory wrap around at 0:0 and finding the<br />
total system memory size.<br />
46 Memory wrap around test done. Memory size calculation over. About to go for<br />
writing patterns to test memory<br />
47 Pattern to be tested written in extended memory. Going to write patterns in base<br />
640K memory<br />
48 Pattern written in base memory .Going to findout amount of memory below 1M<br />
memory.<br />
49 Amount of memory below 1M found and verified.Going to findout amount of<br />
memory above 1M memory<br />
4B Amount of memory above 1M found and verified. Check for soft reset and<br />
going to clear memory below 1M for soft reset.(if power on,go to check<br />
point#4Eh)<br />
4C Memory below 1M cleared. (SOFT RESET) Going to clear memory above 1M<br />
4D<br />
4E<br />
4F<br />
50<br />
Memory above 1M cleared.(SOFT RESET)Going to save the memory size.(goto<br />
check point #52h).<br />
Memory size display started. (NOT SOFT RESET)About to display the first 64k<br />
memory size.<br />
Memory size display started. This will be updated during memory test. Going for<br />
sequential and random memory test.<br />
Memory testing /initialization below 1M complete. Going to adjust displayed<br />
memory size for relocation/shadow.<br />
51<br />
52<br />
53<br />
Memory size display adjusted due to relocation/shadow. Memory test above 1M to<br />
follow.<br />
Memory testing/initialization above 1M complete. Going to save memory size<br />
information<br />
Memory size information is saved. CPU registers are saved. Going to enter in real<br />
mode<br />
8
Appendix A<br />
54 Shutdown successful, CPU in real mode. Going to disable gate A20 line and<br />
disable parity /NMI.<br />
57 A20 address line ,parity/NMI disable successful. Going to adjust memory size<br />
depending on relocation/shadow.<br />
58 Memory size adjusted for relocation/shadow. Going to clear Hit message.<br />
59 Hit message cleared. message displayed. About to start DMA<br />
and interrupt controller test<br />
60 DMA page register test passed. To do DMA# 1 base register test<br />
62 DMA# 1 base register test passed. To do DMA#2 base register test.<br />
65 DMA#2 base register test passed. To program DMA unit 1 and 2<br />
66 DMA unit 1 and 2 programming over. To initialize 8259 interrupt controller.<br />
7F Extended NMI sources enabling is in progress.<br />
80 Keyboard test started . clearing output buffer,checking for stuck key ,to issue<br />
keyboard reset command.<br />
81 Keyboard reset error/stuck key found. To issue keyboard controller interface test<br />
command<br />
82 Keyboard controller interface test over. To write command byte and init circular<br />
buffer<br />
83 Command byte written , Global data init done . To check for lock-key.<br />
84 Lock-key checking over. To check for memory size mismatch with CMOS<br />
85 Memory size check done. To display soft error and check for password or bypass<br />
setup.<br />
86 Password checked. About to do programming before setup.<br />
87 Programming before setup complete . To uncompress SETUP code and execute<br />
CMOS setup.<br />
88 Returned from CMOS setup program and screen is cleared.About to do<br />
programming after setup<br />
89 Programming after setup complete . Going to display power on screen message.<br />
8B First screen message displayed. message displayed . PS/2 Mouse<br />
check and extended BIOS data area allocation to be done.<br />
8C Setup options programming after CMOS setup about to start .<br />
8D Going for hard disk controller reset.<br />
8F Hard disk controller reset done. Floppy setup to be done next.<br />
91 Floppy setup complete . Hard disk setup to be done next.<br />
95 Init of different BUSes optional ROMs from C800 to start.(please see Appendix-I<br />
for details fo different BUSes).<br />
96 Going to do any init before C800 optional ROM control<br />
97 Any init before C800 optional ROM control is over. Optional ROM check and<br />
control will be done next.<br />
98 Optional ROM control is done. About to give control to do any required<br />
processing after optional ROM returns control and enable external cache<br />
99 Any initialization required after optional ROM test over. Going to setup timer data<br />
area and printer base address.<br />
9A Return after setting timer and printer base address.Going to set the RS-232 base<br />
address<br />
9B Returned after RS-232 base address . Going to do any initialization before<br />
Coprocessor test<br />
9C Required initialized. Before Coprocessor is over. Going to initialize the<br />
coprocessor next.<br />
9D Coprocessor initialized. Going to do any initialization after Coprocessor test.<br />
9E Initialization after coprocessor test is complete . Going to check extd keyboard,<br />
keyboard ID and num-lock<br />
9F Keyboard ID command to be issued.<br />
A2 Going to display any soft errors.<br />
9
A3 Software error display complete. Going to set keyboard typemate rate.<br />
A4 Keyboard typematic rate set . To program memory wait states.<br />
A5 Going to enable parity/NMI<br />
Appendix A<br />
A7 NMI and parity enabled. Going to do any initialization required before giving<br />
control to optional ROM at E000.<br />
A8 Initialization before E000 ROM control over. E000 ROM to get control next<br />
A9 Returned form E000 ROM control. Going to do any initialization required after<br />
E000 optional ROM control<br />
AA Initialization after E000 optional ROM control is over. Going to display the<br />
system configuration.<br />
AB To build MP table if needed.<br />
AC To uncompress DMI data and execute DMI post init.<br />
B0 System configuration is displayed<br />
B1 Going to copy any code to specific area.<br />
00 Copying of code to specific area done Going to give control to INT-19 boot loader<br />
Testing Point<br />
2A Different BUSes init (system,static,output devices)to start if present.<br />
38 Different BUSes init(Input ,IPL,general devices) to start if present.<br />
39 Display different BUSes initialization error messages.<br />
10