
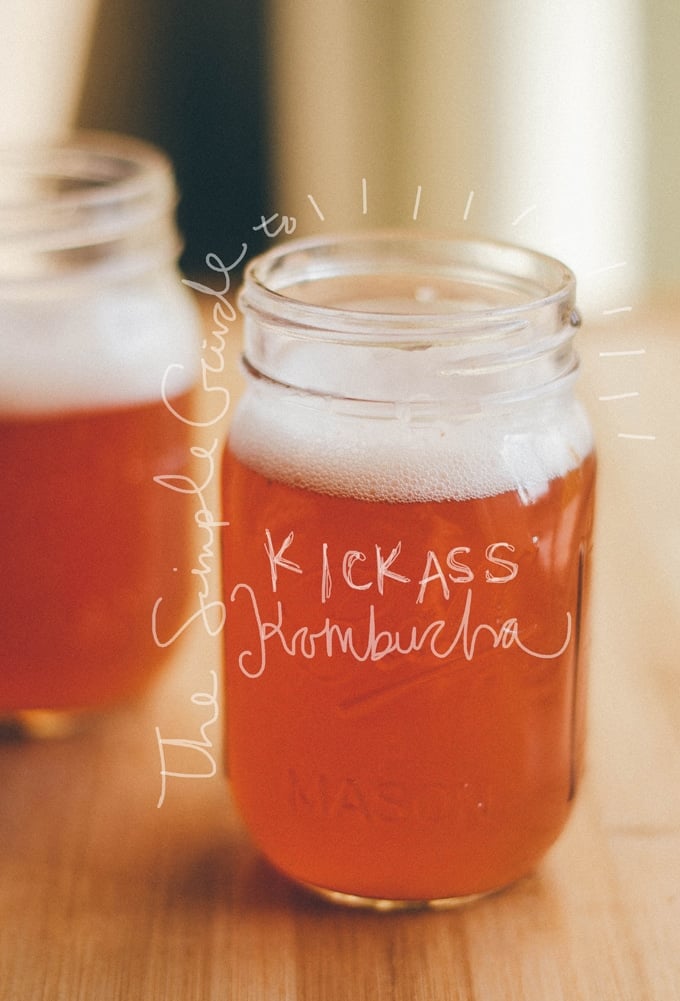
It’s a big day everyone! The day your intestinal microbiota have been begging you for. The day you say goodbye to expensive store bought kombucha. The day you become a brewmaster as I impart on you the secrets of homemade kombucha!
The goal of this guide is to be your one stop shop for homemade kombucha brewage, from SCOBY-less to fermented perfection. No hopping around the interwebs. No fuss. No confusion. Because making homemade kombucha is so simple (albeit a bit slow), and I hope after reading this you’ll give it a whirl! Let’s hop right to it.
How to Make Homemade Kombucha: Overview
This post will go into detail about each step in the process of making kombucha. For succinct instructions, scroll to the bottom where a recipe card lays out the basics of making homemade kombucha. The general order of things goes something like this (you can jump around this tutorial by clicking the links below):
- Make SCOBY (1 to 4 weeks) – to make the “mother”
- First Fermentation (6 to 10 days) – to make the actual kombucha
- Second Fermentation (3 to 10 days) – to carbonate the kombucha
You can also click to jump to a few useful resources:
- Supplies needed – My top tools for brewing ‘buch
- Kombucha FAQ – Be sure to check out the comments section as well for answers to many questions
How to Make Kombucha Video
Before we start, here are some general notes that are consistent throughout the whole homemade kombucha process.
- No metal or plastic containers. Metal can react with the acidic kombucha and hurt your SCOBY, while plastic can house nasty bacteria that you don’t want sneaking in.
- Clean is key. A recurring theme in kombucha brewing is that EVERYTHING must be CLEAN! We’re creating the perfect environment for good bacterial growth, but if a bad bacteria slips in, it could ruin your batch (and make you pretty sick).
- Temperature plays a role. Fermentation goes a bit quicker in warmer temperatures, and a bit slower in colder.
- No mold zone. If you see any mold growing on your SCOBY or in the tea (which I understand can be difficult to discern from the hideous SCOBY, but will generally be green, white, or black), then toss your whole batch.

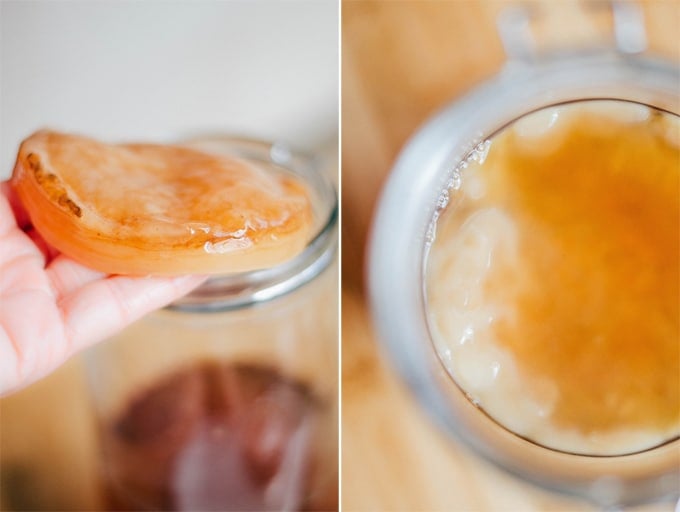
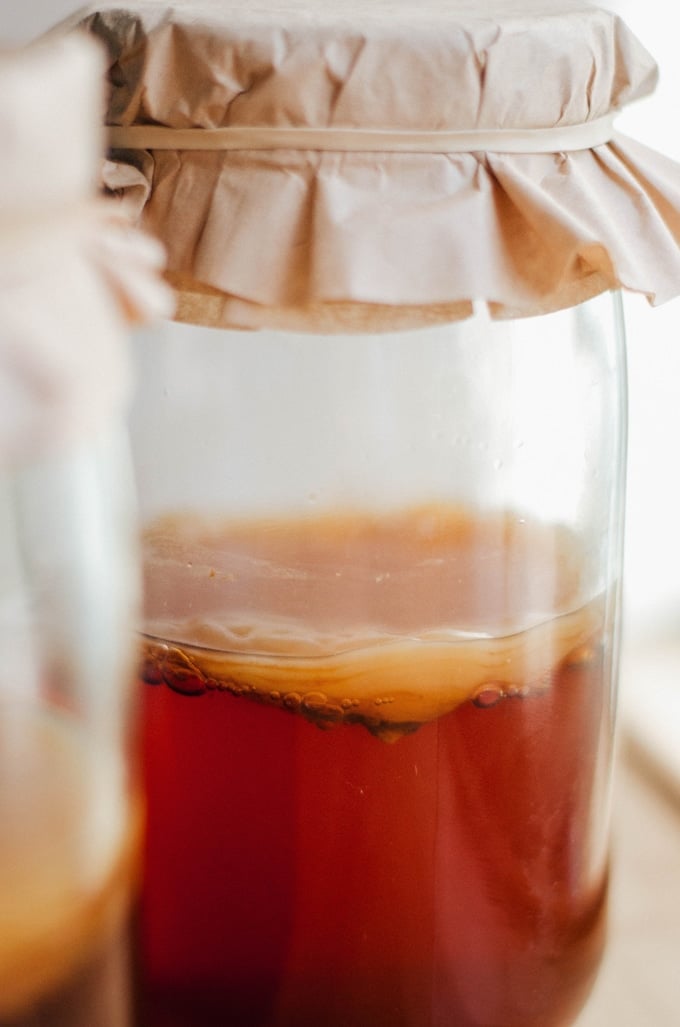
1. How to make a homemade kombucha SCOBY
The SCOBY (symbiotic culture of bacteria and yeast) is the mother of the kombucha, providing bacteria and yeast to ferment the sweet tea, protecting the tea from outside contaminants, and providing a loose seal to keep a bit of the carbonation in. Yes, it’s scary and alien looking and Buzzfeed did a whole article about how ugly this mama is…but it’s the very essence of kombucha! It brings the love and flavor and magic!
Making a SCOBY Ingredients:
- 7 cups (1.6 L) clean water
- ½ cup (100 g) white sugar
- 4 bags black tea (or 1 Tbsp loose tea)
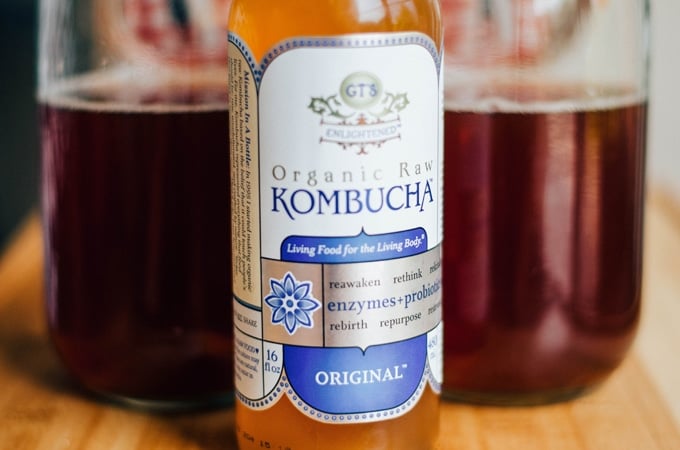
- 1 cup (235 mL) unpasteurized, unflavored store bought kombucha
- A large glass or ceramic container (two jars holding at least ½ gallon (1.9 L) each, or one jug holding at least 1 gallon (3.7 L)). Alternatively, use a glass jug with a built in spigot to make pouring the kombucha out easier!
- Tightly woven cloth (coffee filters, paper towels, napkins, cheese cloth)
- Rubberbands
Making a SCOBY Instructions:
- Bring water to a boil in a clean pot. Remove from heat and dissolve sugar into it.
- Add the tea and allow to steep while water cools to room temperature (a few hours). Only when water is at room temperature is it ready to work with (test by drawing out some water with a paper straw, using your finger to keep the ‘buch in the straw).
- Pour the sweetened tea into your jar(s), then pour store-bought kombucha in (if you’re using two jars, pour ½ of the storebought kombucha into each), making sure to include any little gunkies that may be at the bottom. These are good!
- Cover with a few layers of the tightly woven cloth (keeps out bugs and debris) and secure with a rubber band.
- Set somewhere dark, still, and room temperature (70-75 degrees F, 21-24 C), like a cupboard, for 1 to 4 weeks, until a ¼ inch (½ cm) SCOBY has formed.
- Keep SCOBY in its original tea until you’re ready to brew your first batch. The SCOBY should live and grow for years if treated with love. The tea you used to make the SCOBY, however, is very vinegary and should be tossed. Don’t use this tea as the starter to your first fermentation!
Things to note when making your SCOBY:
- No decaf. The SCOBY doesn’t like decaf tea and will not grow as well if fed it (SCOBY = my spirit animal)
- Only black tea. Similarly, the SCOBY doesn’t grow as well with green or fruity teas. By all means, once your SCOBY is big and strong you can use green tea, but for now stick with black.
- No honey. Honey can contain botulism bacteria that, when grown exponentially as bacteria and yeast tend to do in kombucha, can be dangerous. You can use honey in the second fermentation, once there are a higher number of good bacteria to fight off the bad, but for now, stick to sugar.
- Don’t mess with it! You won’t see anything but a few bubbles in the first few days. But then one day a thin, translucent layer will form, eventually thickening into a full on SCOBY. If it floats sideways or sinks, leave it! It’s just doing it’s SCOBY thang.
- It’s all in the proportions. As I mentioned, I made two SCOBYs with this recipe, and you could probably make more. As long as you keep the proportions in check (7 c water : 1 c starter : 4 bags tea : 1/2 c sugar), you’ll be fine. Also note that this is the same proportion we’ll use in the first fermentation, but on a larger scale to make more ‘buch!
- Got leftovers? Never throw your SCOBY away! Share the kombucha love by gifting it to a friend, or make it into a delicious gummy candy!

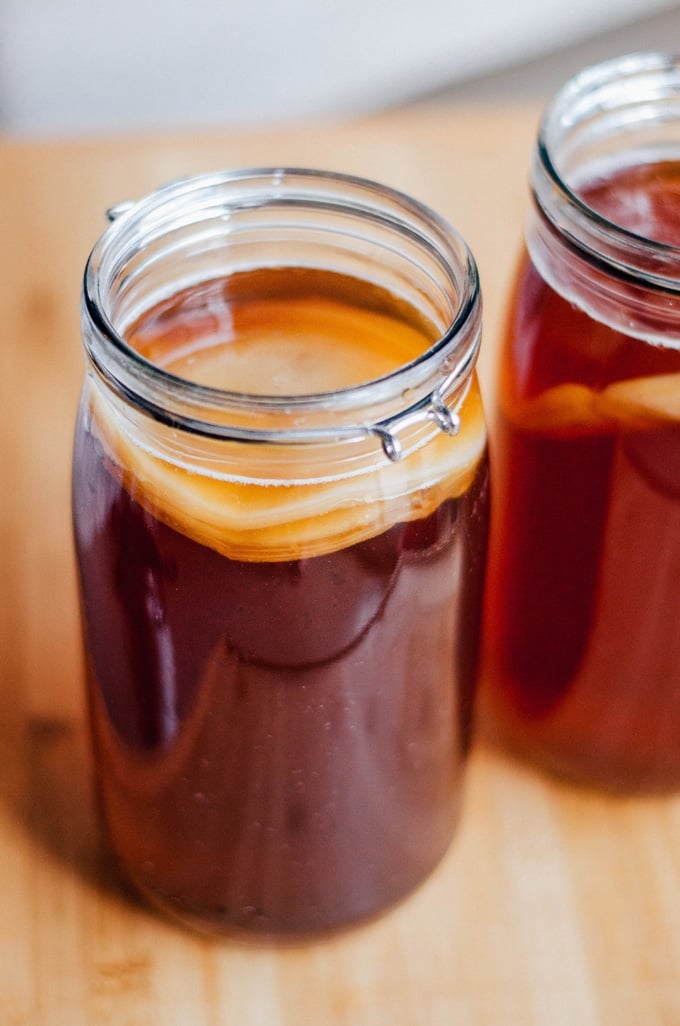
2. Homemade kombucha: The first fermentation
So you’ve got a newbie SCOBY and you’re ready to get this komboo-choo train rollin’. This first fermentation is where you actually make the kombucha.
First Fermentation Ingredients:
- 14 cups (3.5 quarts, 3.3 L) clean water
- 1 cup (200 g) white sugar
- 8 bags black or green tea (or 2 Tbsp loose leaf)
- 2 cups (470 mL) unflavored kombucha (either from a previous batch or unpasteurized, unflavored store bought kombucha
- 1 or 2 SCOBYs (depending on how many containers you’re using, 1 per container)
- A large glass or ceramic container (two jars holding at least ½ gallon (1.9 L) each, or one jug holding at least 1 gallon (3.7 L)). Alternatively, use a glass jug with a built in spigot to make pouring the kombucha out easier!
- Tightly woven cloth (coffee filters, paper towels, napkins, cheese cloth)
- Rubberbands
First Fermentation Instructions:
- Bring water to a boil in a clean pot. Remove from heat and dissolve sugar into it.
- Add the tea and allow to steep while water cools to room temperature (a few hours). Again, MUST be room temperature. Don’t risk killing your SCOBY in hot water.
- With hands AS CLEAN AS A SURGEON’S (really clean), gently remove your SCOBY from the tea and place on an equally as clean plate. You can rinse out the jar if you want (without soap), but it’s not necessary.
- Pour the sweetened tea into your jar(s), then pour in unflavored starter kombucha (if you’re using two jars, pour ½ of the starter kombucha into each).
- Gently place SCOBY into jar then cover with a few layers of the tightly woven cloth and secure with a rubber band.
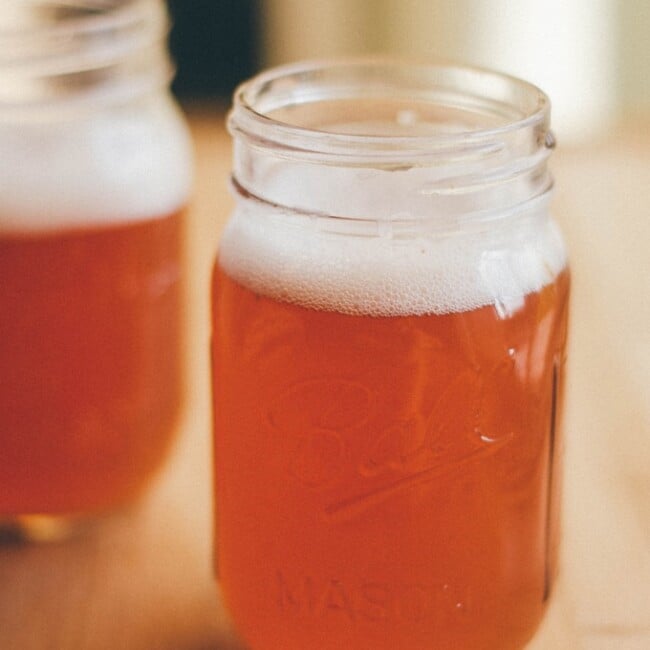
- Set the jar(s) somewhere dark, still, and room temperature (70-75 degrees F, 21-24 C) for anywhere from 6 to 10 days. Begin tasting the tea at about 6 days by gently drawing out some of the tea with a paper straw (using your finger to hold the tea in the straw, don’t use your mouth). It should be mildly sweet and slightly vinegary. The warmer the air temperature, the faster the kombucha will ferment. The longer the tea ferments, the more sugar molecules will be eaten up, the less sweet it will be.
- Reserve 2 cups from this batch to use as starter kombucha for your next batch (just leave it in the jar with SCOBY(s)). The rest can move into the second and final fermentation.
Things to note about the first fermentation:
- In this step, unlike in the making of the SCOBY, you can use other teas besides black. Feel free to experiment with green, white, oolong, or combinations of them. Fruit teas should be mixed with a few black tea bags to ensure the SCOBY mama gets what she needs to thrive.
- Once the SCOBY gets to be about an inch (2.5 cm) thick, peel off a few layers to create a second SCOBY (you can share the love and gift this to a friend!)

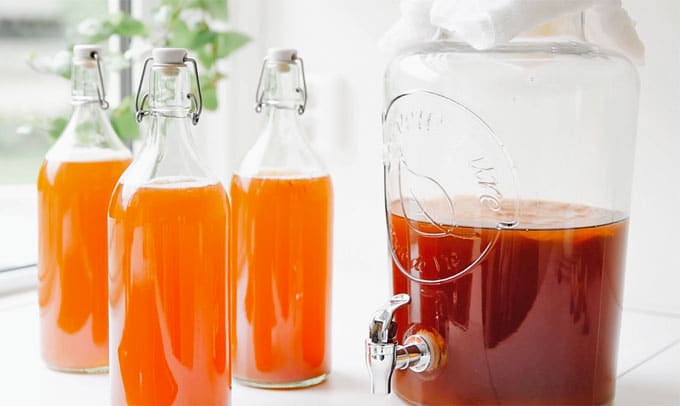
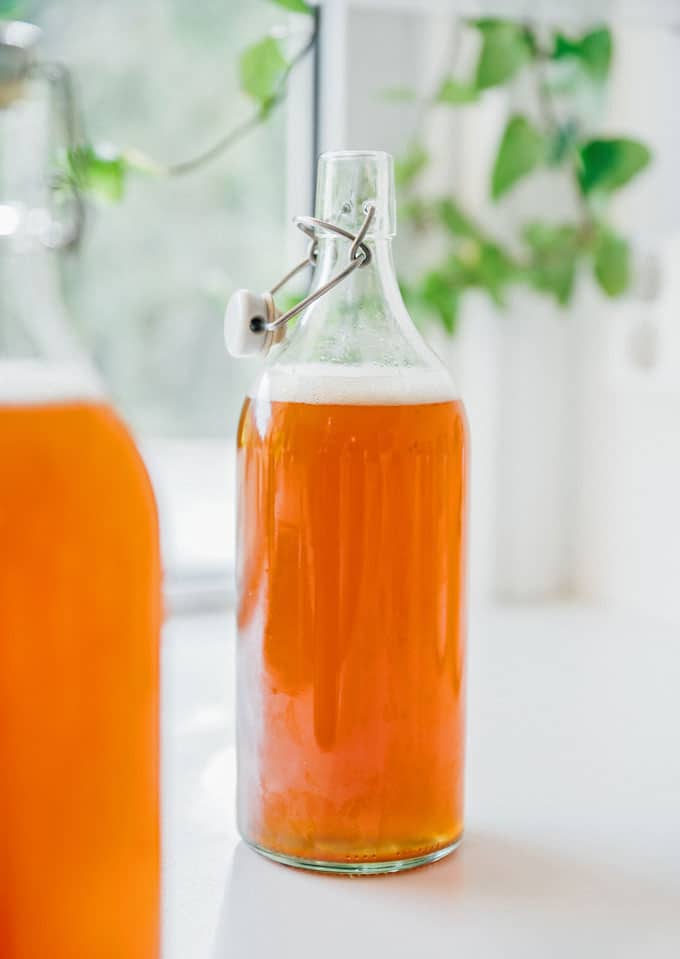
3. Homemade kombucha: The second fermentation
The final step and negotiably the best part of the process! The second fermentation is where the real magic happens. It’s where you can play around with sweet, fruity flavors that will not only make your homemade kombucha taste better than store-bought, but will give those good bacteria the power to kick it into high carbonation gear, bringing everything together into effervescent bliss. Let’s finish this.
Second Fermentation Ingredients:
- Homemade kombucha from the first fermentation
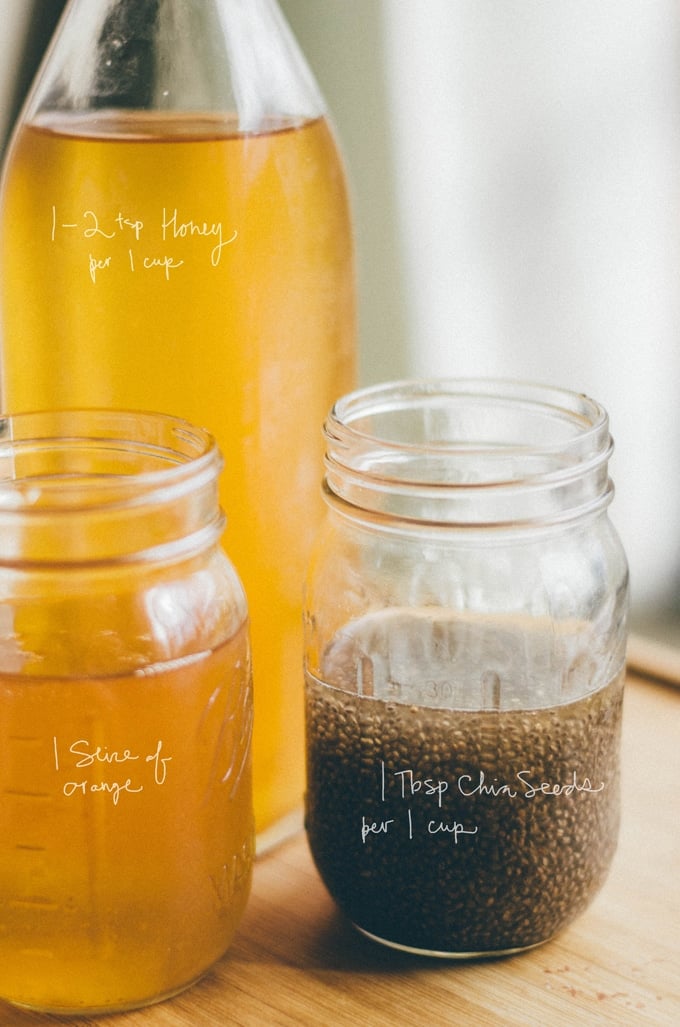
- Sweetener (fruit, honey, or sugar). Here are a few ideas per 1 cup kombucha:
- 1 to 2 Tbsp mashed fruit or fruit juice
- A slice of orange
- 1 to 2 tsp honey
- a piece of peppermint candy
- a piece of candied ginger
- *to add chia seeds, see below under “things to note”
- A few flip top fermentation bottles (bottles meant for fermentation have an airtight seal, which will prevent carbonation from escaping. If you don’t have these, canning jars will do an alright job, though they aren’t truly airtight.)
Second Fermentation Instructions:
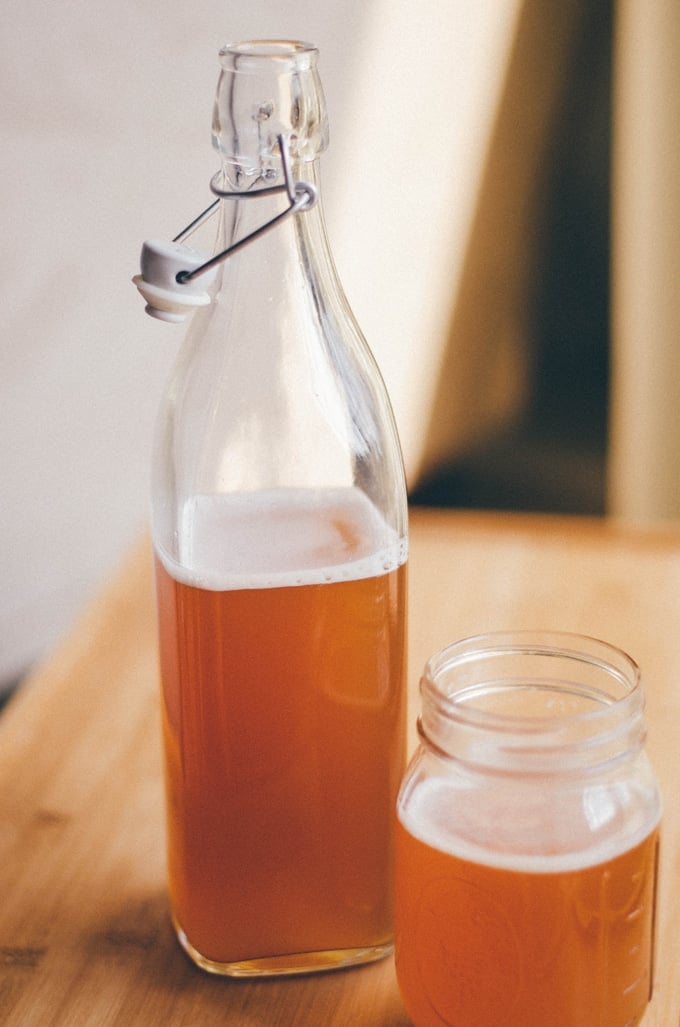
- Strain kombucha and funnel into bottles, leaving about 1 1/2 inches at the top (3.8 cm).
- Add your chosen sweetener and seal tightly with lid.
- Let ferment somewhere dark and room temperature for 3 to 10 days.
- If desired, strain out fruit before serving. Place in fridge to slow the carbonation process.
Things to note about the second fermentation:
- Your jars can explode if the pressure becomes too high! For your first few batches while you’re still getting the hang of how kombucha reacts to your environment, bottle a portion of it in a plastic bottle. This will act as a gauge for how the others are doing. When the plastic bottle is rock solid, the rest are probably done. “Burp” them by opening each to release some pressure, then place them in the refrigerator to slow fermentation.
- Carefully open bottles over the sink with a towel in hand.
- The more sugar/fruit you add, the faster the kombucha will ferment and become carbonated.
- Chia seeds are my favorite addition to kombucha. Rather than adding these to the ‘buch when we add the sweetener, we’ll stir these in at the very end after the kombucha has been carbonated. Use 1 Tbsp of chia seeds per 1 cup of kombucha. Stir in the seeds and allow them to do their absorbing thang for a few hours, stirring every once in a while to keep them from clumping.
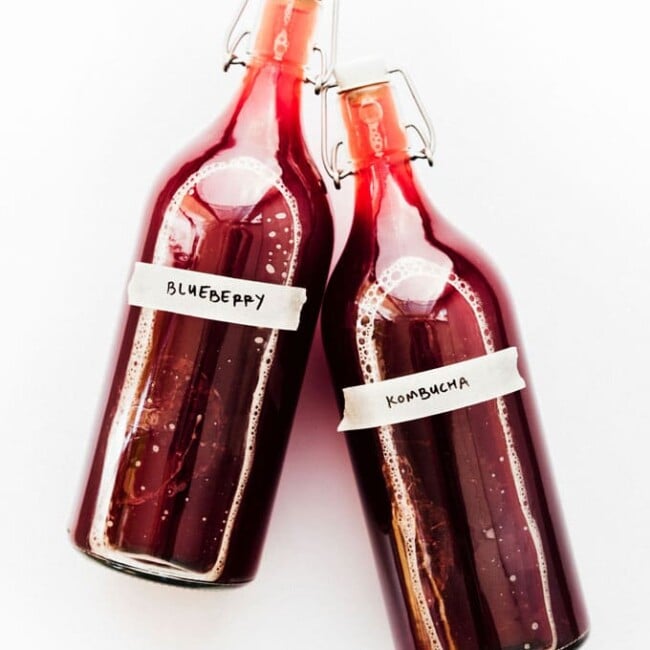
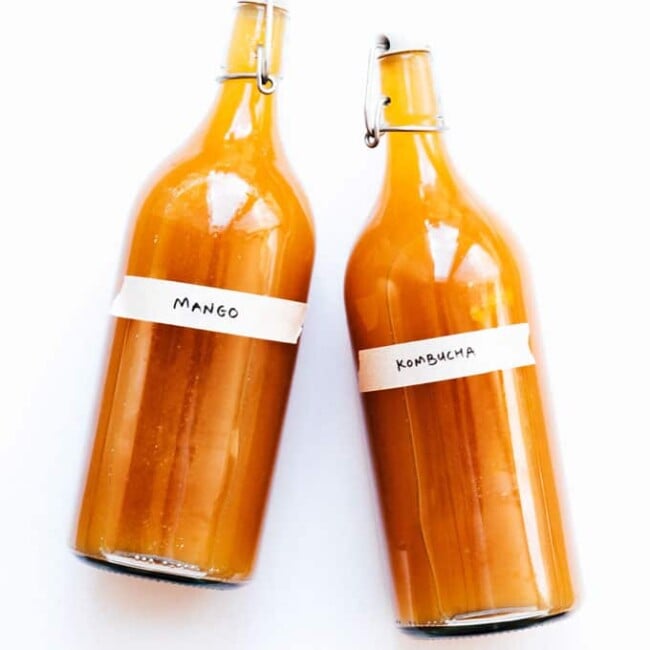
Favorite Kombucha Flavors
I’m always experimenting with new flavors of kombucha. I’m always adding new kombucha flavors to this list, but here are a few of my favorites:
- Mango Kombucha
- Blueberry Kombucha
- Ginger Pepper Kombucha
- Pineapple Basil Kombucha
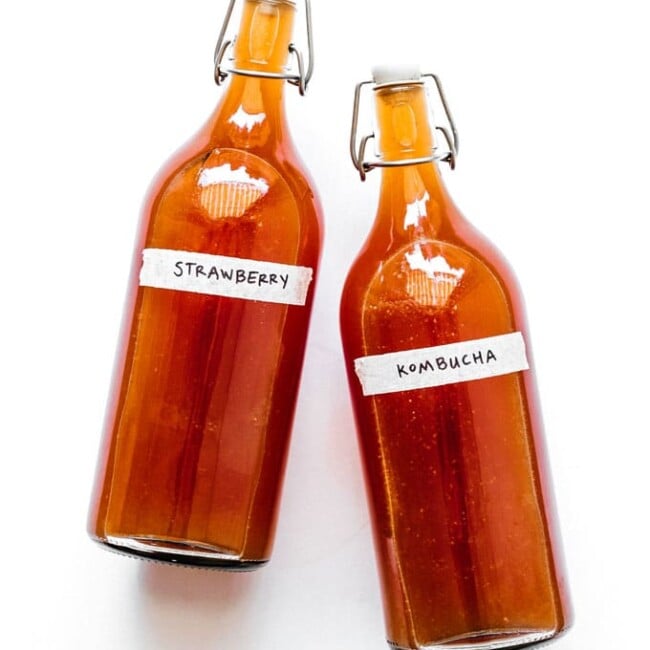
- Strawberry Kombucha (perfect for a Kombucha Ice Cream Float)
- Peach Pie Kombucha
- Mojito Kombucha
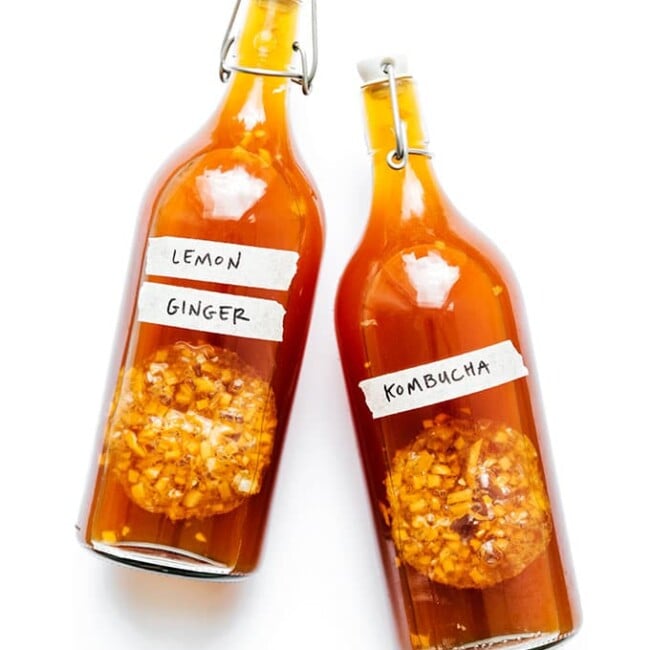
- Lemon Ginger Kombucha (great in a Kombucha Radler)
- Apple Cinnamon Kombucha
- Pumpkin Spice Kombucha
Supplies Needed for Making Kombucha
Below is a list of the supplies needed to make kombucha. The links are affiliate links, meaning I may earn a commission if you make a purchase (I’ve only included products I know and trust).
- Black tea: Plain black tea lays the base for your kombucha.
- Store bought starter tea: You’ll need a starter tea to get things going (but can use your home brewed kombucha to start the following batches).
- Large glass or ceramic container: Aim for one that’s at least 1 gallon, but two 1/2 gallon jars will also work! I’ve also been using a large jar with a plastic spigot recently, and it makes pouring the kombucha so much easier.
- Cheese cloth: Allows your kombucha to breathe while keeping dust and critters out.
- Flip top fermentation bottles: These bottles have a tight seal specifically designed to keep the carbonation in (hellooo fizz!)
- Starter kit: Want kombucha sooner than later? This bundle includes most of the equipment you need plus it comes with a ready-made SCOBY.
Ingredients
Making a SCOBY
- 7 cups clean water 1.6 L
- ½ cup white sugar 100 g
- 4 bags black tea or 1 Tbsp loose tea
- 1 cup unpasteurized, unflavored store-bought kombucha 235 mL
First Fermentation
- 14 cups clean water 3.5 quarts, 3.3 L
- 1 cup white sugar 200 g
- 8 bags black or green tea or 2 Tbsp loose leaf
- 2 cups unflavored kombucha (from previous batch or store-bought kombucha) 470 mL
- 1 or 2 SCOBYs 1 per container
Second Fermentation
- Homemade kombucha from the first fermentation
- Sweetener
Instructions
Making a SCOBY
- Make Tea: Bring water to a boil in a clean pot. Remove from heat and dissolve sugar into it. Add the tea and allow to steep while water cools to room temperature. Only when water is at room temperature (test by drawing out some water with a straw), is it ready to work with!
- Add Starter: Pour the sweetened tea into your jar(s), then pour store-bought kombucha in (if you’re using two jars, pour ½ of the store bought kombucha into each).
- Ferment: Cover with a few layers of the tightly woven cloth and secure with a rubber band. Set somewhere dark and room temperature (70-75 degrees F, 21-24 C) for 1 to 4 weeks, until a ¼ inch (½ cm) SCOBY has formed.
First Fermentation
- Make Tea: Bring water to a boil in a clean pot. Remove from heat and dissolve sugar into it. Add the tea and allow to steep while water cools to room temperature.
- Add Starter: With really clean hands, gently remove your SCOBY from the tea and place on a clean plate. Rinse out jar(s). Pour the sweetened tea into your jar(s), then pour in starter kombucha.
- Ferment: Gently place SCOBY into jar then cover with a few layers of the tightly woven cloth and secure with a rubber band. Set the jar(s) somewhere dark and room temperature (70-75 degrees F, 21-24 C) for anywhere from 6 to 10 days. Begin tasting the tea at about 6 days by gently drawing out some of the tea with a straw. The longer the tea ferments, the more sugar molecules will be eaten up, the less sweet it will be.
- And Repeat: Reserve 2 cups from this batch to use as starter kombucha for your next batch (just leave it in the jar with the SCOBY(s)). The rest can move into the second fermentation.
Second Fermentation
- Flavor: Strain kombucha and funnel into bottles, leaving about 1 1/2 inches at the top (3.8 cm). Add your chosen sweetener and seal tightly with lid.
- Ferment: Let ferment somewhere dark and room temperature for 3 to 10 days.
- Serve: If desired, strain out fruit before serving. Place in fridge to slow the carbonation process.
Nutrition Information
Homemade Kombucha FAQs
Most kombucha contains less than 0.5% ABV (for reference, beer has about 5% ABV), so it is not likely that you will get drunk from kombucha.
The high amount of probiotics in kombucha mean that drinking too much can lead to GI discomfort (bloating and in some cases diarrhea). Kombucha also contains caffeine and sugar, which may also effect you.
Kombucha contains probiotics, which contribute to a healthy gut microbiome (and in turn, help regulate weight and obesity). It also contains antioxidants and polyphenols.
When you put kombucha in the refrigerator, fermentation slows down dramatically. You can therefore store it in the fridge if you need to take a break from fermenting, or to chill it prior to serving.
This is one of few recipes where you really cannot use sugar substitutes. BUT you won’t actually be consuming that whole 1 cup of sugar. The sugar is food for the bacteria and yeast. They’ll basically eat it all up and produce wonderful things like acidity and carbonation, and the finished kombucha will be much lower in sugar as a result.
Yes! Your kombucha SCOBY may sink or float around the container. This is totally normal and nothing to worry about. It will likely float back to the top eventually, or a second SCOBY may form on top (which is also okay).
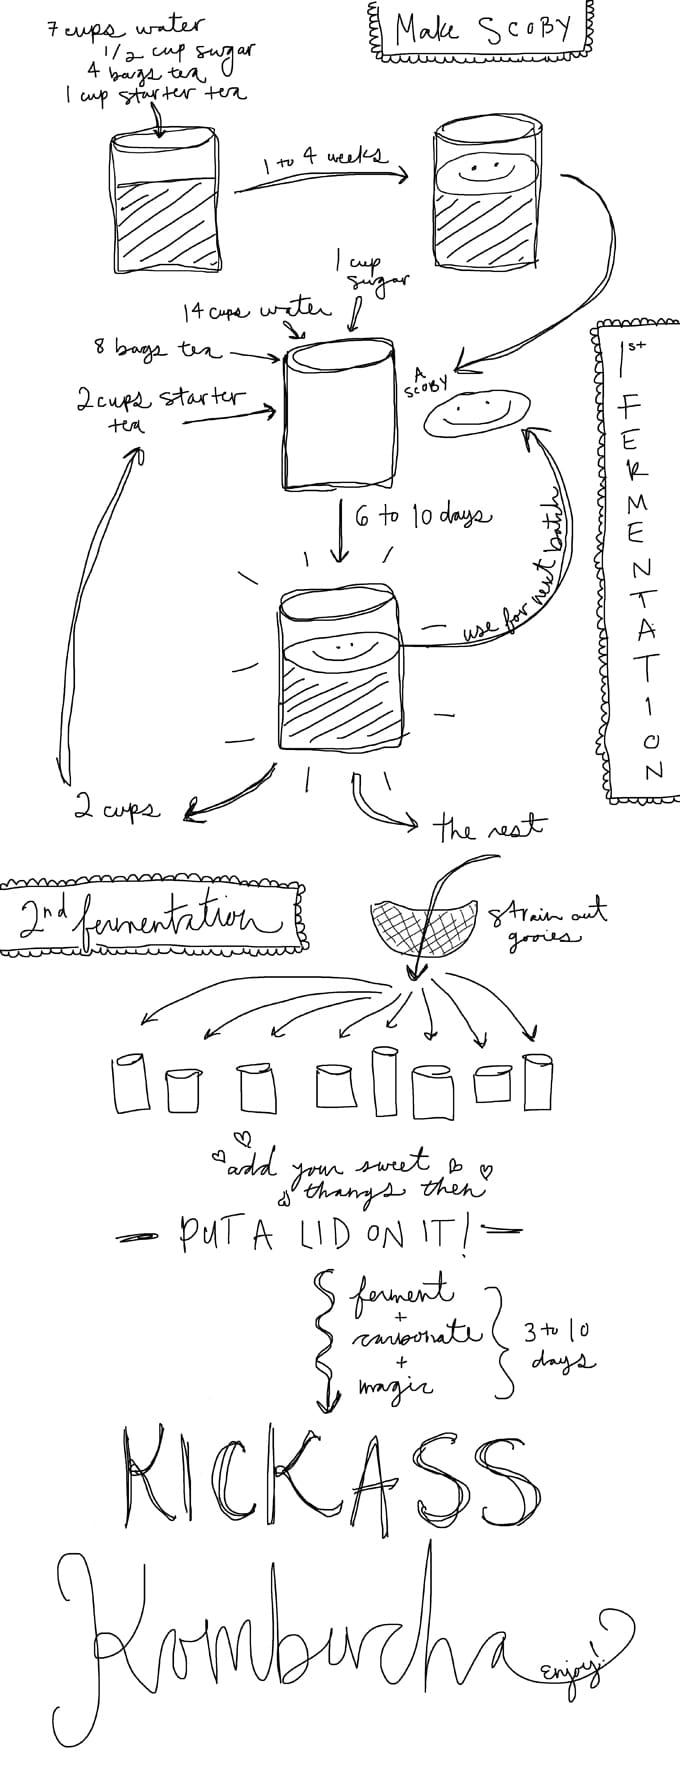
Homemade Kombucha: Bringing it all together
I drew this way professional depiction of the whole process for the visual learners. If you have any questions or hesitations about brewing homemade kombucha, don’t hesitate to comment below and I’ll help ya out! Happy brewing!
Print the Homemade Kombucha Guide
By popular demand, I’ve created a printable PDF with all the instructions from this post. Enter your email below and it will be sent to you!
Taylor says
Hi! I hope you’re still reading this!
I’ve followed all your steps, made my scoby (turned out beautifully) and then did the first fermentation. My scoby sank to the bottom when I first put them in my jars. Well today is day 6 and I went to check on them… The scoby are still at the bottom and there is a questionable looking layer on the top of both jars. I followed all the instructions to a tee. Everything was super clean. I don’t know what happened! I’m afraid to try it as I’m worried its mold on top. Could it be a new scoby forming since both of mine in both jars are at the bottom? I really don’t know but I’m extremely heartbroken. Perhaps I could email you a picture.
Thanks,
Taylor
Sarah says
Hi Taylor! So happy to hear you got beautiful scobys! I think it’s probably just another scoby growing on top, which is totally normal. This article has some photos to help you to determine if it’s mold. They also have this article which shows you what is NOT mold. Feel free to email me a photo if you still aren’t sure and I can try to help 🙂
Nadine says
HI, Would you please send me a printable option of your recipe/method please.
Sarah says
Hi Nadine! If you put your email in the box at the top of the post (where it says “Get Printable”), a PDF will be emailed right to ya!
Marci S Thorsen says
Hi Sarah, how can you calculate how much sugar is in the finished kombucha? I drink it daily, have been brewing for several months. My belly fat is getting worse. Sugar seems to be my kryptonite.
Sarah says
Hi Marci! That’s a really great question and one I’ve never been able to quite figure out. Some googling is telling me that you can expect there to be 2 to 6 grams of sugar (in 1 cup of finished kombucha). The longer you let it ferment, the less sugar there will be in the finished drink. Hope this helps some! 😀
Carol Marini says
Looking for the printable PDF version please
Sarah says
Hi Carol! If you put your email in the box at the top of the post (where it says “Get Printable”), a PDF will be emailed right to ya!
Kake says
I have a question.
How many scobies do I need to use if I want to use one gal glass jar for First Fermentation? The recipe says one scoby for one jar but I was wondering if I need more than one for a big jar such as 1 gal.
Thanks.
Sarah says
1 SCOBY should be enough to brew 1 gallon! 😀
Kake says
First, Thank you for great informations.I have two scobies growing nicely:) but I think I am going to use only one of them for first fermentation. How can I keep another scoby? I will use it maybe two or three weeks later..
Sarah says
Hi there! If you plan on using it in just a few weeks, I’d recommend making the base tea as described in the post (black tea + sugar + starter tea) and letting the scoby hangout in there. This will keep it healthy and growing! 🙂
Bryan says
Thanks for the pdf recipe!
Morgan says
Hello! So I didn’t see any anything in the instructions about how long to steep my tea bags in the water and ended up forgetting them for 2.5 hours while the water was cooling. I added the scoby and am letting it ferment, but I am wondering if my batch will be ruined because of this? Thank you!
Sarah says
Hi Morgan! They should be fine, I usually leave the tea bags in until the water cools to room temp, so 2.5 hours shouldn’t be a problem at all 😀
Cornelia says
Hey, I was so excited to see the scoby develop. However now when I am making the tea, my scoby won’t stay afloat. Is that bad/ will it surface later?
Sarah says
Hi Cornelia, that’s fine! It will float around and probably resurface soon enough 🙂
Audra Prier says
PDF Printable Recipe for Kombucha please =)
Sarah says
Hi Audra! If you put your email in the box at the top of the post (where it says “Get Printable”), a PDF will be emailed right to you!
Carly says
I followed the recipe but my scoby isn’t floating and settled on the bottom of the jar. Did I do something wrong? Do I need to start over?
Sarah says
It’s fine if your SCOBY doesn’t float to the top right away. It is still fermenting even from the bottom, and will probably float to the top eventually 😀
Kristen says
I have made a few batches of Kombucha with pretty good success. My last batch, I forgot to add sugar to and didn’t realize it until about 7 days into the first fermentation process. I will just throw out the tea, but do you think this did anything to harm my scoby?
Sarah says
Hi Kristen, I don’t think this would hurt the SCOBY too much, especially if you put it in some sugar tea now. I would feel confident still using that SCOBY 🙂
Winora Kunselman says
Someone gave us some but we don’t know what steps were already done? So please go ahead and send me the pdf!
Sarah says
Hi Winora! If you enter your email address in the box at the top of the post, the PDF will be emailed right to ya.
Jan says
Great information! Thank you so much!
Sarah says
Happy to hear, Jan! Let me know if you run into any questions
Diane T says
After the first fermentation, you say you can use some of the SCOBY for a second fermentation and leave the rest in the tea from the first. How long can it be stored this way? Do I need to feed it?
Basically, I’m wondering if I can preserve it if I don’t want to constantly have batches going.
Thank you for the detailed instructions!
Sarah says
Hi Diane! You can keep it for a few weeks like this, but it will stay healthiest if you feed it with fresh sugar tea (in the proportions mentioned in the instructions) every other week or so 🙂
Angela Boudreau says
Hi
I’d like the printable PDF please.
Thank you!
Sarah says
Hi Angela! If you enter your email in the box at the top of the post the printable PDF will be emailed right to ya 🙂
Mae says
I’m so excited, I bought everything last night. My only questions are below:
Making the SCOBY Phase:
“Keep SCOBY in its original tea until you’re ready to brew your first batch. The SCOBY should live and grow for years if treated with love. The tea you used to make the SCOBY, however, is very vinegary and should be tossed.”
Just to clarify, it’s okay to keep the SCOBY in the original/starter liquid until I start the first fermentation, correct? Once, starting the first fermentation that’s when I toss the original “bitter/vinegary” liquid.
Also, how do I store the SCOBY after the second fermentation? Meaning what liquids do I keep it in to make sure it is healthy/thriving? Do I ever need to change the liquid?
Sorry, I thoroughly read through the printable version and still have these question. Thank you in advance!
Sarah says
Hi Mae! All good questions and I hope I can clarify.
-Yes, keep the SCOBY in the liquid it grew in until you start the 1st fermentation, then you can throw out that liquid. If you plan to keep it longer (a few weeks after the SCOBY has fully formed), it could be beneficial to “feed” it with a little more sugary tea.
-If you’re not going to start a new batch immediately after you brew your first, just put the SCOBY in sugary tea (in the same proportions as listed in the instructions: 7 cups water, ½ cup sugar, 4 bags black tea, 1 cup kombucha). This will give the SCOBY enough to stay healthy and thriving for a few weeks if you want to take a break.
I hope this helps but definitely let me know if you still have questions!
Sarah says
Hi there, I am interested in keeping it on tap – I have a kegerator and empty Keg. Do you have any advice or warnings? Can put it straight in the keg before the second fermentation?
Sarah says
That sounds so delicious and amazing, Sarah! I’ll admit I haven’t tried keeping it in a keg so I’m not sure what differences there would be, but this article may be able to get you on the right track. Would love to hear how it goes! 😀
Diana Hess-Fisher says
thanks so much !
Michelle says
About to transfer my new SCOBY to start my first first-fermentation. It’s going great. You made the instructions very easy to follow. Thank you!
Sarah says
So happy to hear, Michelle (and congrats on the SCOBY!)
Emily says
Thanks for this! About to start the process today, so I’m jumping the gun a bit with this question, but when it comes time to bottle it, along with adding a fruit or fruit juice, can I also add a capsule of spirulina powder or blue majik powder?
Sarah says
So exciting, have fun brewing! I haven’t actually added powders before, but I would probably treat them similarly to chia seeds and stir them in just before serving (or after the sweetener/fruit carbonation stage, so when you go to put them in the fridge). Let me know if you have any questions along the way!
Gina Stafford says
I own a coffee shop and would love to add this to my menu. I have a couple of question: The recipe calls for:
(2 cups unflavored starter tea (from previous batch or store-bought kombucha) 470 mL)
Does the starter tea come from making the SCOBY?
And when I use loose tea do I put the loose tea in a bag or just take a tablespoon of loose tea and add to the jar. Sorry for the questions, but I just want this to come out kick ass:)
Sarah says
Such an exciting addition to the menu!! If this is your 1st batch, your starter tea should optimally come from a store bought kombucha (the tea used to make the SCOBY is quite old/acidic). After you get your batches going you can use starter tea from pervious batches 😀
And I would put the loose tea in a bag so you can strain it out before fermentation.
Let me know if you run into anymore questions, happy to help! 😀
Kayla Calix-Hestick says
How can I get a copy of this in PDF form?
Sarah says
Enter your email into the box at the top of the post and a PDF will be emailed to ya 😀
Suzanne Humpleby says
What if you can’t find unflavored Kombucha at the store?
Sarah says
Great question Suzanne! Unflavored is really best because it is 100% kombucha (opposed to containing juice) and will therefore give you the best shot of success. If you can’t find it anywhere, I would suggest starting with a kombucha that has as minimal flavoring as possible (and be sure you see some “floaties” in the drink, these will help catalyze the process).
Monica Carter says
I was given a SCOBY last week. I’d like to start using it. I went and got everything I needed yesterday, except for the starter tea. I struggled to find it anywhere, all the Booch sold where I live is flavoured. What would you suggest, is there a substitute? Not much liquid came with the SCOBY.
Sarah says
Hi Monica! Unflavored kombucha seems to be harder to find these days. I would suggest using all the tea (what little there is) that the SCOBY came in + whatever minimally flavored kombucha you can get your hands on. Just be sure to look for “floaties” in the tea. These are a sign that the tea will stimulate the SCOBY growth. Happy brewing!
Amanda H says
Hello! I’m starting to make my first batch of tea with a SCOBY I got from a generous friend who has been brewing for a while. I am going to be brewing in some 1 gallon glass jars, but he was brewing in big, wide mouthed 5-gallon buckets, so as you can imagine, the SCOBY he gave me is huge! I want to cut it down to fit into my jars, do you have any tips on this? I know a lot of places say to avoid using metal when brewing, but would cutting the SCOBY with a steel knife hurt it in any way? Also, should it fit perfectly in the jar or can I cut it a bit smaller and let it grow to the shape it needs? Thanks for all of your help!
Sarah says
Great question, Amanda! You can cut the SCOBY in half/squares and add it to your smaller jars. It will grow into the shape of your jars. Metal should be avoided for long term exposure, but for cutting it’s perfectly fine to use a metal knife.
Happy brewing! 😀
Karen says
Hi, can you send me the pdf? I’m excited to try this 🙂
Thanks
Sarah says
Hi Karen! If you enter your email into the box at the top of the post the PDF will be emailed right to ya 🙂
Charlie Pribilski says
I can’t wait to try this myself, but I do have one question? When you are making the scoby, do you pour in half of 16 oz store-bought kombucha, or half of 1 cup into the sweetened black tea?
Sarah says
You’ll need 1 cup (8 oz) total. If you’re making it all in one jar, it can all go in that. If you’re splitting between two jars then pour 1/2 cup into each 😀
Salim says
I just started brewing my kombucha and I am doing fine with my first two batches. I read somewhere if we don’t handle the process correctly it can be dangerous to health, do have any additional info? Also my son is autistic and suffer gut issues. Could Kombucha help him, and it what proportion. Thank for your time and answers.
Sarah says
Happy to hear your first batches went well! Indeed, if you don’t ensure things are very clean then it could lead to bacterial growth (which is why we use very clean hands/equipment). But by just keeping things clean, the acidity of the kombucha will also do it’s part to kill off any other bacteria that may slip in. And with that said, you will generally know if your kombucha has gone bad (for example, mold growths on the SCOBY).
I honestly don’t know much about the autism/gut connection so I don’t want to give you any false information. I searched a bit and I think this could be a good starting point for your with some scientific references. Hope this helps some and enjoy the kombucha! 😀
Charlie says
Thank you so much
Charlie says
Will 2 “Ball Wide Mouth Half Gallon 64 Oz Jars with Lids and Bands” do for the second fermentation, or what do you recommend?
Sarah says
Hi Charlie! I would recomend something with a flip top lid. The lids on mason jars are decent, but they won’t hold in as much pressure as flip tops (meaning your finished buch might not be as bubbly, or will take longer to get there).
Paula says
Hi Sarah, thank you for these great instructions. I purchased a Scoby and have started the process. Today is day 6 and I’ve tasted the tea. It’s still fairly sweet so I think a I should leave it and taste it again tomorrow. The Scoby that I purchased is floating in the middle of the jar but guess what? There is another Scoby that is covering the top of the jar. It is thin but I had to move it aside to get a straw in there to extract some tea. Is that normal?
Sarah says
Hi Paula, you’re right on track! It’s totally fine if it floats around and if a small one forms on top. Soon you’ll have 2 SCOBYs 🙂
Raj says
Hi Sarah, I looks like my Scoby is ready (I will know tomorrow) when I start my first fermentation. You said to save two cups with the Scoby. Do I keep it in a dark place like the Scoby at 70 plus degrees and for how long can I keep it before it gets too vinegary? Second if for some reason the Scoby gets mold is there some way to rescue it or is the only option to start over? Third can I add a capsule of probiotics to the first fermentation so I make the bacteria more diverse and add lactobacillus to the culture or will this ruin the scoby?
Sarah says
Hi Raj! Congrats on the nearly finished SCOBY!
If you’re starting the 1st fermentation tomorrow, just throw away all the liquid the SCOBY is currently in and replace it with fresh tea. Store the same way (70/dark) for about a week until it’s ready. If you let it go past a week it will become vinegary, which isn’t dangerous for the SCOBY, just not nice to drink.
If you find mold on the SCOBY, it’s always best to cut your losses and throw it away. You don’t want to risk drinking anything contaminated.
And finally, I’ve honestly never thought to add a capsule and my gut tells me (haha…get it?) that the SCOBY would not appreciate it. It’s quite a balance you have going on in those jars and the SCOBY keeps it all churning and under control. I would probably avoid adding anything to the SCOBY (if anything, add it in the 2nd fermentation when you won’t risk hurting the SCOBY).
Raj says
Thanks Sarah, keeping the starter for a week, means the cycle repeats every week? I would prefer to re-start the cycle every two or 3 weeks in which case the starter gets too vinegary? What are my options?. Also, I am mostly organic (including wine) so my tea is organic loose leaf tea from Assam (the lower the elevation the tea is grown the stronger it is and I like strong tea) and my sugar is raw organic florida cane sugar crystals. I will update on the results so others know whether this combination works or not. Tea bags are not a good idea for those who are picky about such things as I am. I grew up in Sri Lanka and when I was growing up they would dump the tea dust as piles of future compost. Then they invented tea bags and guess they no longer dump the dust, it goes in the tea bags. It’s not bad but its not tea leaf.
Sarah says
Hi Raj! Yes the cycle will restart every week. You can put your SCOBY on “pause” a bit by just making the usual tea mixture (black tea + sugar + starter kombucha) and setting your SCOBY in there. It will turn to vinegar but that’s okay, your SCOBY will be happy and when you’re ready to start again 2 or 3 weeks she’ll be ready for ya!
I would be curious to hear how it goes with your loose leaf tea! 😀
Raj says
Thanks for perfect instructions Sarah!! The Scoby was perfect!! Based on your suggestion to throw out any Scoby that goes bad, I hedged my bets, cut it into 3 pieces and made 3 batches. I also tasted the vinegar that was with the Scoby and it tasted fabulous for a vinegar. We consume Apple Cider vinegar with the mother and rice vinegar and unless I hear from you not to consume it, this looks like a 3rd favorite vinegar for us.
Also, the jar I used was a Bed, Bath and Beyond glass tea kettle for $9.99 (less of course the 20%). It was a fabulous choice as the size is just right for half a batch and it’s so easy to sterilize (just boil some water) and its easy to use as it has a handle and a lip for pouring. I have a total of 3, one for the Scoby and the other two for the 1st fermentation.
Sarah says
So happy to hear, Raj! From what I’ve read, it’s okay to consume the vinegar (I’ve just never tried it!) Also loving the idea of using a kettle. You’ve got a whole operation going it sounds like! Happy brewing 🙂
Elley says
Thank you for your post.
Just put my first batch to grow a scoby on a shelf.
I used GTS original to get it started. There was already a little scoby in it!
Hopefully all will go well.
Sarah says
Yay, happy kombucha-ing! Let me know if you run into any issues along the way 😀
Charlie Pribilski says
Do i leave the two scobys with the 2 reserved cups of starter kombucha, from the 1st “1st fermentation”, and save the scobys to make a whole new batch, for another 1st fermentation?
Terry Demers says
please send a printable copy of Kombucha recipe. I have a scoby. Thank you.
Sarah says
Hi Terry! If you enter your email in the box at the top of the post, the PDF will be emailed right to ya 😀 Happy brewing!
cher young says
Have made several batches so far. Use less sugar now because it was too sweet but I suspect I should lengthen days in 1st and 2nd fermentation? Also, have you figured out nutritional values? Thanks
Sarah says
Indeed, if you let it brew a little longer the sweetness will be reduced. Nutritional values are a bit hard to calculate for this exact reason. Depending on the length of fermentation, there will be different levels of sugar in the brew. You can get a general indication using the info from store bought.
Santini says
I love how detailed and informative you wrote the recipe! Definitely going to try this someday! Thank you for sharing this!
Sarah says
Thanks so much, Santini! 😀
Raj says
It’s been a great success Sarah!! Thanks!! I have 8 of previously bought and consumed 16 fl Kombucha bottles going in the second fermentation. I am going to halve the quantities for next time, as 4 bottles at a time will work better for me. I am opening them a fraction of a second to release the pressure every day or so. Waiting for it to get a little bit more sour before I put them in the frige’. Maybe it came easier for me as I have made fermented foods before. The bottles I added the probiotic powder taste the same as the others so I will continue doing this as good quality probiotics are so expensive and once they are in the Kombucha I can keep the capsules for a long time (I used 1 capsule across 3 bottles). The vinegar tastes great and I use it at the same time I use my Braggs Apple Cider Vinegar (this has a slightly milder taste and some say it has even more benefits than Apple Cider vinegar). I split the Scobys into 4 batches so if I lose a few I have a back up instead of starting over. One of my scobys had a blue patch (not sure if it was mold). Instead of throwing it away, I washed it in white vinegar, let it soak for a while and put it with another starter. I will throw it away if it turns blue again but it looks great so far.
Sarah says
So happy to hear, Raj!! Thanks for the updates, sounds like it’s going beautifully! 😀
David says
Great presentation, Sarah! Just started our SCOBY brew last night….
I’m an avid homebrewer and when bottling newly fermented beer one must be meticulous about not introducing air, otherwise the beer will get an oxidized, “off” flavor shortly after bottling. So very careful siphoning is required, ideally into bottles that have been purged with CO2. Do I need to be concerned about this with kombucha, or just funnel into clean bottles and no worries? Thanks!
Sarah says
Hi David! From my experience (and after Googling around a bit to confirm), oxidation shouldn’t be a problem with kombucha (one of few fermentations where oxygen is ok!) Happy brewing! 😀
Paula says
Hi. I am doing my second batch. The first batch came out really good but not much carbonation. I didn’t sweeten it during the second fermentation, could that be why? With this second batch I smashed blueberries and put about a tablespoon in, juice and all and it fizzed up right away so maybe this one will be fizzier. Is it going to be okay to have those blueberries in there sitting at room temperature on the counter for all that time? They won’t go bad?
Sarah says
Hi Paula! Yep, during the 2nd fermentation you need to add a sugar sweetener (i.e. fruit, juice, honey, sugar) in order for the kombucha to carbonate. The bacteria/yeast are basically eating the sugar and producing carbonation from the sugar 🙂 The fresh fruit should be okay, just be sure to use fairly new/fresh fruit (nothing on the brink of molding). With that, the acidic kombucha will help prevent it spoiling as well.
Jules says
Hey Sarah,
thanks for the awesome guide! My friend just gifted me some SCOBY so I’m super keen to embark on this kombucha journey! Just a few questions and im sorry if they’ve already been asked there’s so many comments!
1) can you alter the quantities? Like 14 cups of water seems like a huge amount, was hoping to start with a smaller amount for my first go since I don’t have jars big enough for all that water!!
2) how long can you keep your kombucha in or out of the fridge after the second fermentation? You mentioned that the fridge slows the fermentation, how long after it’s “ready” can I keep it before it’s no longer good to drink?
Again sorry if these questions are repeats 🙂
Sarah says
Hi Jules! So exciting you already have a SCOBY to start with 😀
1. Yep, you can reduce the amount. Just keep the proportions the same.
2. Kombucha will last a few months in the fridge after bottling (don’t keep it out of the fridge or it will keep fermenting).
Let me know if you have any other questions and happy brewing!
Anne says
Hi Sarah
I’ve just did the 2nd step this morning, but in reading all the comments above I realise now I didn’t have any starter tea, there were only a very small amount of tea in with the scoby I was given and it had string like stuff in it, so I tipped it out. Does that mean the kombucha won’t ferment as it’s supposed to?
Sarah says
Hi Anne! You’ll need to get some starter tea in there to keep the acid balance correct. If you can’t find any, you can also use distilled white vinegar for this first batch (until your SCOBY starts producing tea to use as a starter). Let me know if I can answer anymore questions! 😀
Emily says
Hi Sarah! So I just made the SCOBY Mama and I’m ready to do the second fermentation. I have two questions! The first fermentation to make the Mama, I know we use store bought kombucha as starter tea and normal sugar to ferment it. But for the second fermentation, instead of using store bought kombucha as starter tea, can I just leave some of the tea from the SCOBY making fermentation ? And my second question is can I use smushed up fruit and or juice in place of sugar? And if I can, will my kombucha taste like strawberry if I use mushed up strawberry? Thank you !!
Paula says
Hi Sarah, can’t figure out how to reply to your answer on my prior post but anyway, second batch, still no fizz. I added some crushed blueberries during the second fermentation. Great flavor but no fizz. It initially fizzed when I poured the tea in with the berries. Maybe my jars aren’t sealed? I’m using the glass bottles from The Container Store with the stopper that you clip in place so I thought they were super air tight.
Sarah says
Hmm strange! I would try a few things:
1) add more sugar (maybe even just try adding pure sugar or honey to see if it’s a sugar problem).
2) try carbonating a bit of it in a plastic bottle (like a disposable water bottle). You’ll be able to feel when the pressure it building up and know if it’s carbonating (So if the bottle becomes rock hard, the kombucha is indeed carbonating but your bottles aren’t airtight. If the bottle doesn’t become hard, there’s no carbonation happening and the kombucha either needs to be warmer or to have more sugar).
Hope this helps! It’s a bit of trial and error but once you figure it out you’ll be on your way to great, consistent kombucha! 😀
Amanda says
Hey Paula, I can relate to your post! Where did you get your scoby from? Did you make it or did a friend give it to you? I personally got my scoby from a friend and theirs was relatively old. I made my first batch and even though it tasted good, I had no fizz at all. I troubleshooted and made my second batch with sweet tea, one cup of my original batch kombucha, and one cup of a plain, raw, store bought kombucha (I used GT’s original). I let that go through its process and I just checked my bottles yesterday and they are super fizzy, just like you get at the store! I DID sweeten by batch with 1 TBS honey and powdered greens (you need that extra sugar to keep feeding the brew). It’s worth a shot for you, I know it worked for me! FYI – I am brewing in gallon sized glass jars.
Sarah says
Thanks so much for the tips, Amanda! 😀
Karen says
I let a first fermentation go 4 weeks. Ph good to proceed. Should I do a 2nd with added sweetener/fruit or just dump it & start over? Thanks!
Sarah says
Hi Karen! I would taste it and see. If it tastes good to you (good balance of sweet and vinegary), go ahead with the 2nd fermentation (it may have brewed slower with it being winter, so might not be a loss!)
Mike wilson says
Help! I was successful at making 2 scobys, but after the first ferment the Scoby I made with green tea looked clean and “normal”, the one with black tea had a brown stringy slime on the bottom and there were brown particles in the liquid. What I read: this is either normal yeast coloring or toss it out. Advice?
Sarah says
Hi Mike! The brown stringy bits are normal yeast growths, totally fine! You should only be concerned when things start getting fuzzy/blue/green/dry looking. From the sounds of it, your SCOBYs are healthy! 😀