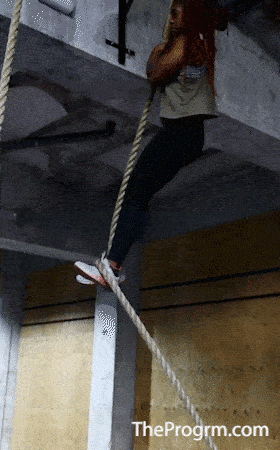
The Best tips and drills to master Rope Climbs

Rope climbing is one of the most misunderstood skills in Crossfit.
It’s easy to get by with subpar rope climbs at the start of your functional fitness journey but if your goal is to ultimately be the best athlete you can be you WILL have to step up your game eventually.
It’s not uncommon to see athletes out on the floor failing their rope climbs or being very inefficient at them due to poor technique.
Luckily with some knowledgeable help you can upgrade your skill almost instantly by understanding the movement correctly and practicing the right drills.
Want to learn how?
You can check out our compete YouTube Rope Climb tutorial below or simply keep reading along.

Drills to improve Rope Climbs
The jump and hang
Why:
Jumping up to the rope can seem like a simple task that shouldn’t require practicing.
However, there are some crucial factors that you must consider.
After all, jumping up is the start of your movement: just like the liftoff on a snatch or clean it can make you or break you.
A powerful and high jump can mean less time under tension as you will have to cover less distance during the actual climbing part.
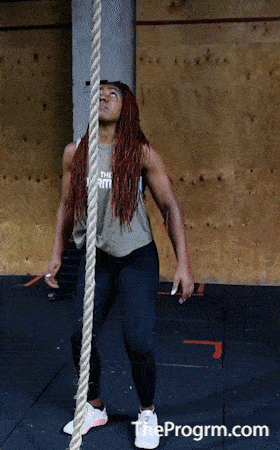
Additionally arm placement should be practiced to ensure you grip the rope correctly and set yourself up for an effortless climb.
If you are new to the movement you will find your grip will be a limiting factor.
This drill can actually help you build grip strength and resilience ultimately keeping you safer when you’re up at the top of that rope.
How:
This means you will start swinging around as soon as you grip that rope. Therefore, take no more than one step or simply start jumping directly upwards.
It doesn’t matter if you lead with your left or your right, what is important is that you practice having your leading arms as straight as possible.
Paradoxically we actually want to avoid arm pulling as much as possible.
Knees to elbow
Why:
The rope climb is a deceptively complex movement.
It requires all muscle groups to come into play, especially if you are focusing on reaching an efficient ( = “gold standard”) rope climb.
Instead the goal is to perform something more similar to knee to elbow.
The best way to do so is by performing a movement resembling a knee to elbows.
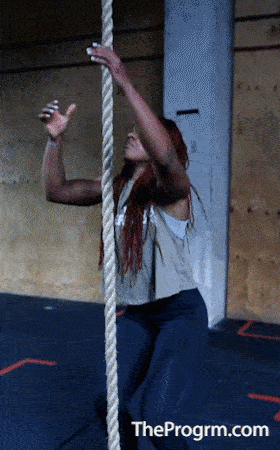
Therefore practicing this drill will allow you become more comfortable with this movement while strengthening your core.
When done successfully, you will travel lots of distance without burning out your arms which have a more limited capacity than your core.
How:
As you do so you will notice that you will start going “back and down” with your upper half: don’t panic.
This is part of the movement and the tighter you keep your lats and core the safer you will be.
Rope slide
Why:
How you move and position your feet is crucial in the rope climb.
It secures every rep, takes a toll off your arms and allows you to travel more distance faster.
This drill can seem fairly obvious and simple but you would be amazed by how many Crossfitters get it wrong.
How:
Standing under the rope, keeping it centered between your leg, take your lead leg (the one that stays on top once you close your feet aroud the rope) and slide your foot upwards by raising your knee.
Your foot should be placed on the opposite side of the rope, so if your lead leg is your right (and is therefore placed on the “right side” of the rope) you will place your foot on the left side of the rope while making sure your shin is at a slight angle so that your knee keeps staying on the left.
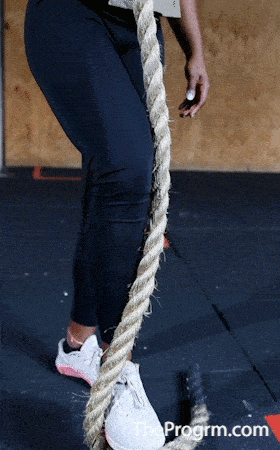
Bring your knee up and make sure you foot keeps close contact with the rope without moving it.
The goal is make sure that when you perform this part of movement during a rope climb your foot doesn’t get caught in the rope dragging it upwards.
This can cause you to “take the rope” with you meaning you will be putting in more work and will not gain any position.
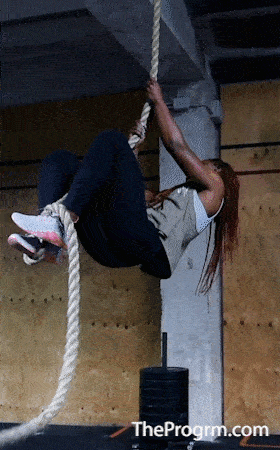
Legs up sliding
Why:
With this drill we are simply bringing together all the previous drills we have practiced in one single smooth movement.
How:
Stand right under it, jump up and grab the rope just as you practiced.
Now while focusing on not pulling with your arms bring your knees to your chest crossing over your feet so that you can perform the foot slide on the rope.
As your lower body is raised you will start reaching an almost parallel to the ground positions with your torso, again that is ok and actually wanted in this movement.
The lock
Why:
It keeps you safe, secures every pull upwards and takes a lot of tension off of your arms and grip.
The lock is THE MOST crucial part of your rope climb.
But what is it exactly?
The lock is the position you bring your feet in to clamp down on the rope and you is a support to keep moving upwards.
How:
You can practice the lock by sitting down on a high box right next to the rope.
Grab the rope to keep it still and then slightly slide your lead foot upwards just as we practiced, meanwhile your other foot should be on the opposite side of the rope compared to your lead foot and tracking slightly behind.
You will then move your NON leading foot ( = tracking foot) around and over your leading foot while bringing the rope with it.
You will therefore create a loop with the rope around your leading foot and your tracking foot should step right onto it in order to clamp down the rope between your feet and create a sort of knot.
The remainder of the rope will be hanging off of your tracking foot.
Once you're in this position you can test how well you executed your lock by pulling yourself up and away from the box you were sitting on.
If your feet stay put and the rope doesn’t slide away underneath, you have executed a perfect lock.
After you’ve become comfortable with the lock drill while sitting on a box you can then progress it by practicing while hanging directly from the rope.

Finally you can start adding it on to the previous drills as a single movement.
The Turnover
Why:
After the lock the turnover is the most overlooked component of the rope climb.
Disregarding it can mean all the work you’ve done to take tension off your arms and grip is going to end up thrown out the window.
The turnover allows you to pull your locked feet under your body allowing you to extend your legs in a squat movement and continue reaching upwards.
How:
You will start by executing all the drills we’ve worked on so far.
So you will jump up, grab the rope, bring your knees up and lock your feet around the rope.
Once you have completed the lock pull your feet under yourself while keeping your core tight.
Again: don’t start pulling with your arms!
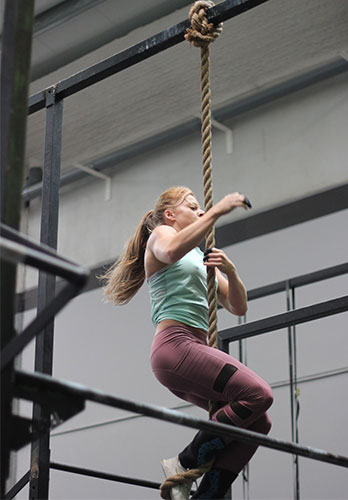
Completing the pull
Once you have finished the turnover you will find yourself with your torso perpendicular to the ground again (you are basically facing upward).
You can then press with your leg in a squatting motion.
As you do so, to maximize how upwards you can reach, you will (finally!) start pulling upwards with your arms.
If you are comfortable try to reach as high up as you can in order to travel as much distance as possible in one single “lock and pull”.
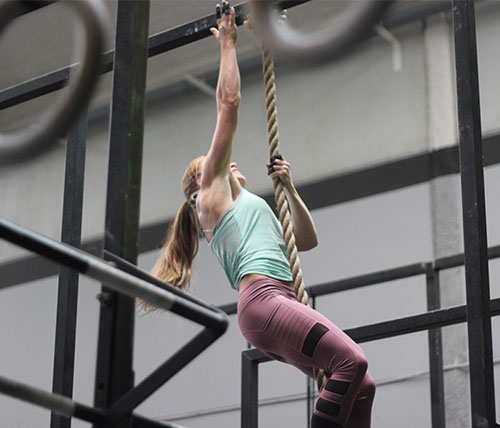
Keep repeating until you reach the top.
The descent
You may think that defying gravity by climbing up a ridiculously high rope may be the hard part of this skill.
But don’t be fooled the descent is actually where you can win or lose a workout.
This is because the descent is where you can build speed but also where your arms are taxed the most.
This dual relationship is crucial: the faster you descend the less time under tension your arms will have to be in the fresher you will be to complete another rope climb or move onto whatever movement you have next.
How:
In order to descend efficiently there are a few techniques that can be used. However in this article we will cover the jay hook technique which builds off the same foot positioning we explained in the lock for the ascent.
Once you’re ready to come down the rope you have to make sure that:
Please note that the less contact you keep with the rope the quicker your descent will be but also the less control over it you will have.
Therefore, we recommend less experienced athletes to keep a good amount of contact with the rope both with their feet and hand.
Your descent will be slightly slower but you will be safer and have the time to get accustomed to the technique.
Once you have a good amount of practice under your belt you can slowly start keeping less contact.