


Panning Photography: 10 Tips for Better Panning Pictures
Using the camera panning technique is a great way to illustrate the sense of motion in your photography. Learn everything about it in this beginner's guide.
Learn | Photography Guides | By Ana Mireles
Shotkit may earn a commission on affiliate links. Learn more.
Do you love to take action shots and capture moving subjects, but your images don’t really render the emotion of what you’re experiencing?
That’s because still photography freezes motion. Not to worry, though – there’s a very fun technique to show speed in your pictures and it’s called panning photography.
In this article, you can learn all the top panning photography tips and tricks to make your photos more exciting.
Are you ready? Let’s get moving!
What is Panning in Photography?
Panning is a photography technique that allows you to depict motion. You can do this by using a slower shutter speed and moving the camera along with the subject.
It sounds simple – and technically, it is. However, you do have to practice panning many times before you can master the technique.
Once you’ve identified your moving subject, pre-focus and adjust the camera settings for a correct exposure using a slow shutter speed.
Then press the shutter button when the subject passes and move the camera along with it. Keep going a bit longer after the shutter closes – this will help you achieve a more natural motion.
Why would a photographer use the camera panning technique?
A photograph is a still frame from a continuous timeline – you can’t see the before and after, so moving objects are frozen.
Doing a panning shot, you communicate to the viewer the subject’s movement.
This is because you’re presenting a subject frozen on a blurred background.
How Do You Take Panning Photography?
- Choose your moving target.
- Position yourself in a place where, ideally, the subject will be passing perpendicular to you.
- Set your shutter speed.
- Adjust the rest of the camera settings for a correct exposure.
- Focus.
- Start shooting while panning to follow your subject.
- Try a slower shutter speed if the background is too sharp or a faster one if it’s too blurred.
- Review your panning pictures to find the best one.
10 Tips for Succesful Camera Panning
1. Choose your subject
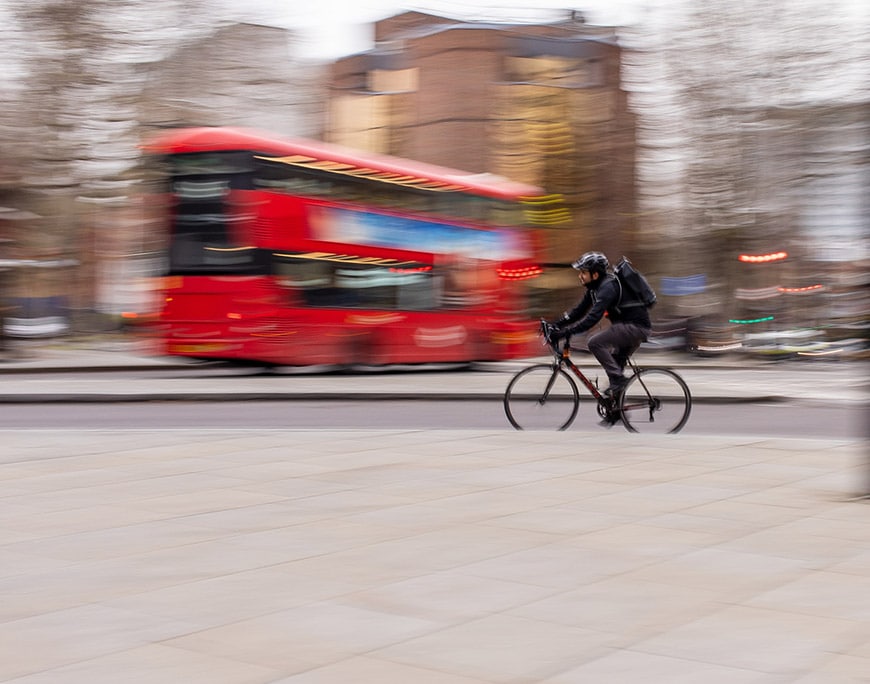
Credit: Dele Oke
You can do panning photography with any moving subject. In fact, you can even do it with static scenes and create abstract photography using linear blur.
However, the most popular pannings feature moving subjects which are separated from the background by selecting a slower shutter speed on your camera.
If you’re new to this technique, you’ll probably want to start with recurrent subjects that move at a similar speed. For example, position yourself on the sidewalk and photograph the cars as they pass by.
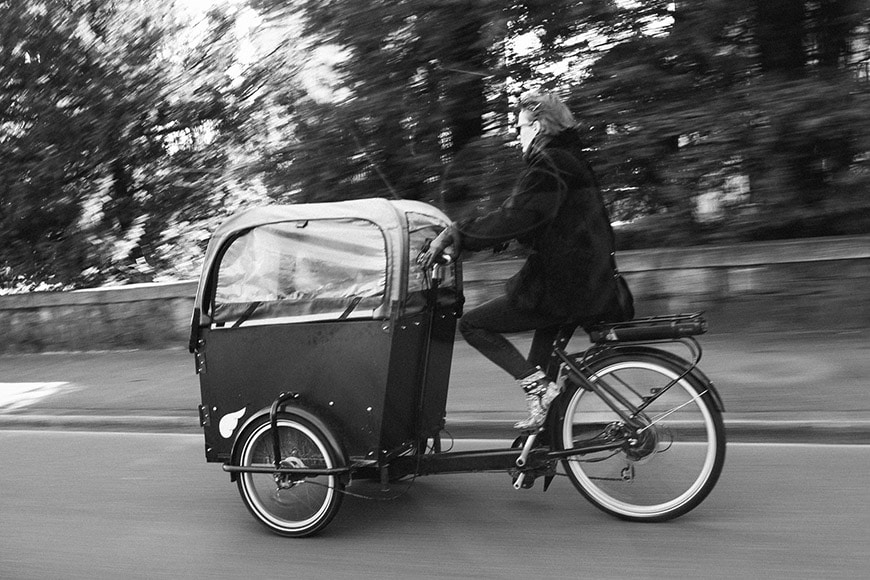
Other popular subjects for beginners to practice on include your faithful pet, a helpful friend that won’t mind running or cycling in front of you over and over again, or some battery-operated toy.
These are great exercises to start with but can get a little boring after a while – and your subject might get tired. So, you can go to a local fair and photograph a roller coaster, visit a sports field and capture runners, cyclists or skaters, and so on.
When you’re ready to up your game, try photographing faster subjects such as birds, horses, racing cars, etc. The best part of panning photography is finding fun subjects to photograph.
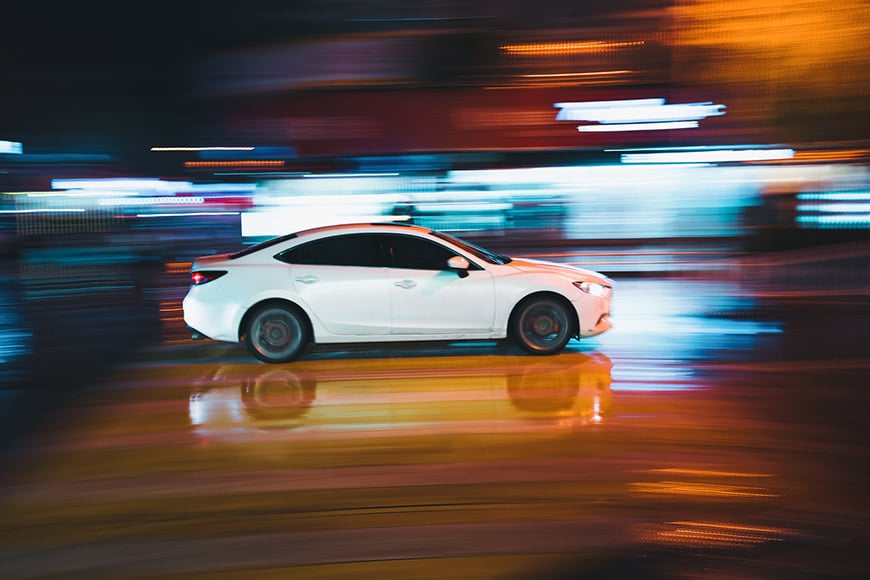
2. Set the shutter speed
Credit: Krzysztof Kowalik
One of the most common questions about panning photography is, “How do I know what shutter speed to use?”.
Well, everybody will give you a different number, and you’ll find many shutter speed cheat sheets online, but the truth is that those are only starting points.
It’s useful to know where to start, but consider that there can’t be a specific shutter speed because it depends on multiple things. How fast is your subject moving? How far are you from your subject? What’s the desired effect? Which lens are you using?
So, don’t get frustrated if you followed a chart and it didn’t work out for you.
For example, if you’re photographing a car you can start at 1/60 sec while for a bicycle it’s better to start with 1/30 sec. Then experiment with different shutter speeds and distances.
How Much Do You REALLY Know About Photography?! 🤔
Test your photography knowledge with this quick quiz!
See how much you really know about photography...

3. Use a Tripod (or Monopod)

Credit: Jess Vide
When you’re using slow shutter speeds, all motion is recorded – that includes the natural unsteadiness we all have when shooting handheld. This is what causes camera shake.
To do a panning shot you want to capture motion but not camera shake – that’s why a tripod will make things easier. Of course, this is only possible if the subject is moving in a straight line.
If you’re dealing with unpredictable movement, a tripod won’t give you enough flexibility – try using a short focal length to diminish the shake and get better results.
Some people think that image stabilization (IS) can help with the panning technique when you don’t have a tripod.
Canon cameras with IS 2 or Nikon ones with VR are in fact useful. If your camera doesn’t have this advanced type of image stabilization, however, it’s better to leave it off.
If you don’t have room to set up all 3 legs of a tripod, or simply want something that allows for more flexibility in movement, a monopod is a great option.
Once you master how to use a monopod, it can quickly become the most useful photography accessory you own – here’s a list of the best monopods for photographers.
4. Try vertical panning

Credit: Adele Cave
While most panning shots are horizontal, there’s nothing to stop you from making an up and down movement and achieving a vertical motion blur.
This is great for subjects that move vertically, like a child jumping on a trampoline – or simply to create abstract or impressionistic art.
5. Shoot from a moving vehicle
Credit: Alessio Lin
Instead of standing in the same position and following the moving object, you can be on the move as well.
For example, if you want to capture the motion of a moving car, you can be in one yourself that’s running parallel to your subject at the same speed.
If you decide to try this type of panning technique, please follow the appropriate safety measures.
You obviously can’t be the photographer and the driver, so ask someone to drive you. Also, do it in an isolated street to avoid creating distractions or obstacles to other drivers that could lead to an accident.
6. Use shutter priority mode

Credit: Milena de Narvaez Ayllon
Knowing how to use the camera in manual mode is a skill that all photographers should master. However, while you get there, you can make use of the semi-automatic modes.
For panning photography, you need to use shutter speed priority mode. On most cameras, you’ll find this function denoted with an S. However, some cameras – Canon cameras, for example – have it marked as Tv, which stands for Time Value.
If you’re having trouble finding the shutter speed priority mode on your camera, check the owner’s manual or do a Google search to learn where it is.
This function allows you to change the shutter speed, and the camera will automatically adjust the aperture to compensate and get a correct exposure.
You can also use the Auto ISO function paired to the shutter priority speed. This way, you’ll only have to worry about one factor from the exposure triangle and focus only on your panning technique.
Auto ISO also includes a minimum shutter speed setting. However, when you’re using shutter priority mode, this setting is bypassed by your choice.
7. Use Continuous Focusing Mode
Credit: Snapwire
Nailing the focus manually can be difficult when you’re doing panning photography – that’s why using auto focus can be helpful.
There are different types of auto focus, though. The one that will work best with moving subjects is the continuous focusing mode. Each manufacturer has a different name for this – on Canon cameras it’s AI-Servo and on Nikon it’s AF-C.
With continuous focusing mode, you can frame your subject and press the shutter halfway to get it in focus. After that, the camera will keep tracking the moving subject and adjust the focus accordingly.
Another feature that you can pair with continuous focus mode is Dynamic Area. You can choose the starting focus point when you’re using this, and the camera will adjust it as the subject moves.
This will give the camera more freedom to look for the information it needs to keep your subject sharp.
8. Use flash to avoid blur in your subject

Credit: Sid Suratia
It doesn’t matter how good you get at following your subject during the panning; you can’t beat the fact that you’re using a slow shutter speed.
This means that even when you match the subject’s speed to have it perfectly sharp, there will still be some motion blur.
Look at the example image above. You can see from the head and the front part of the shirt that it’s a relatively sharp subject, which means the panning was done at the same speed as the subject was moving. However, the hands are still blurred.
If you’re photographing a car, you will notice the blur in the wheels, for example. There’s nothing wrong with this – it’s a big part of the action feel that you normally want to convey with panning shots.
However, there might be some times when you want to have a perfectly sharp subject. To achieve this, you can use camera flash.
This way, you’ll still have a blurred background recorded by the ambient light during the entire time of the shot, and the flash will freeze the moving subject.
9. Distance matters

Credit: William Daigneault
You have to consider two distances when you’re doing panning: the distance between you and your subject and the one between the subject and the background. Both of them can change the perception of speed in a panning shot.
Fast-moving subjects from far away seem to be moving slower. Take that into consideration when you’re, for example, on the race track, and you’re deciding between being on the front row or a back seat higher up.
Now, regarding the distance between subject and background, consider that a shorter distance will allow for a more obvious blur, giving a more intense sense of speed.
Keep in mind these choices when you’re selecting the camera lens.
10. Practice makes perfect

Credit: Markus Spiske
Finally, remember that this is a technique that takes a lot of practice. The only way to master it is by trial and error, so don’t give up if you don’t get the desired results overnight.
The beauty of using a digital camera for panning photography is that every photo is ‘free’, so take the time to experiment by shooting plenty of shots until you get the desired look to your photo – there’s no need to go easy on your shutter button!
Final Words
Now that you have all the information you need, you can start to practice panning images until you get some amazing action pictures.
If you have any questions about panning photography techniques in general, drop us a line in the comments section, and we’ll be happy to help.

Check out these 8 essential tools to help you succeed as a professional photographer.
Includes limited-time discounts.


Ana Mireles is a Mexican researcher that specializes in photography and communications for the arts and culture sector.

👋 WELCOME TO SHOTKIT!

🔥 Popular NOW:
