Gluten Free Bakewell Tarts: Perfect Every Time
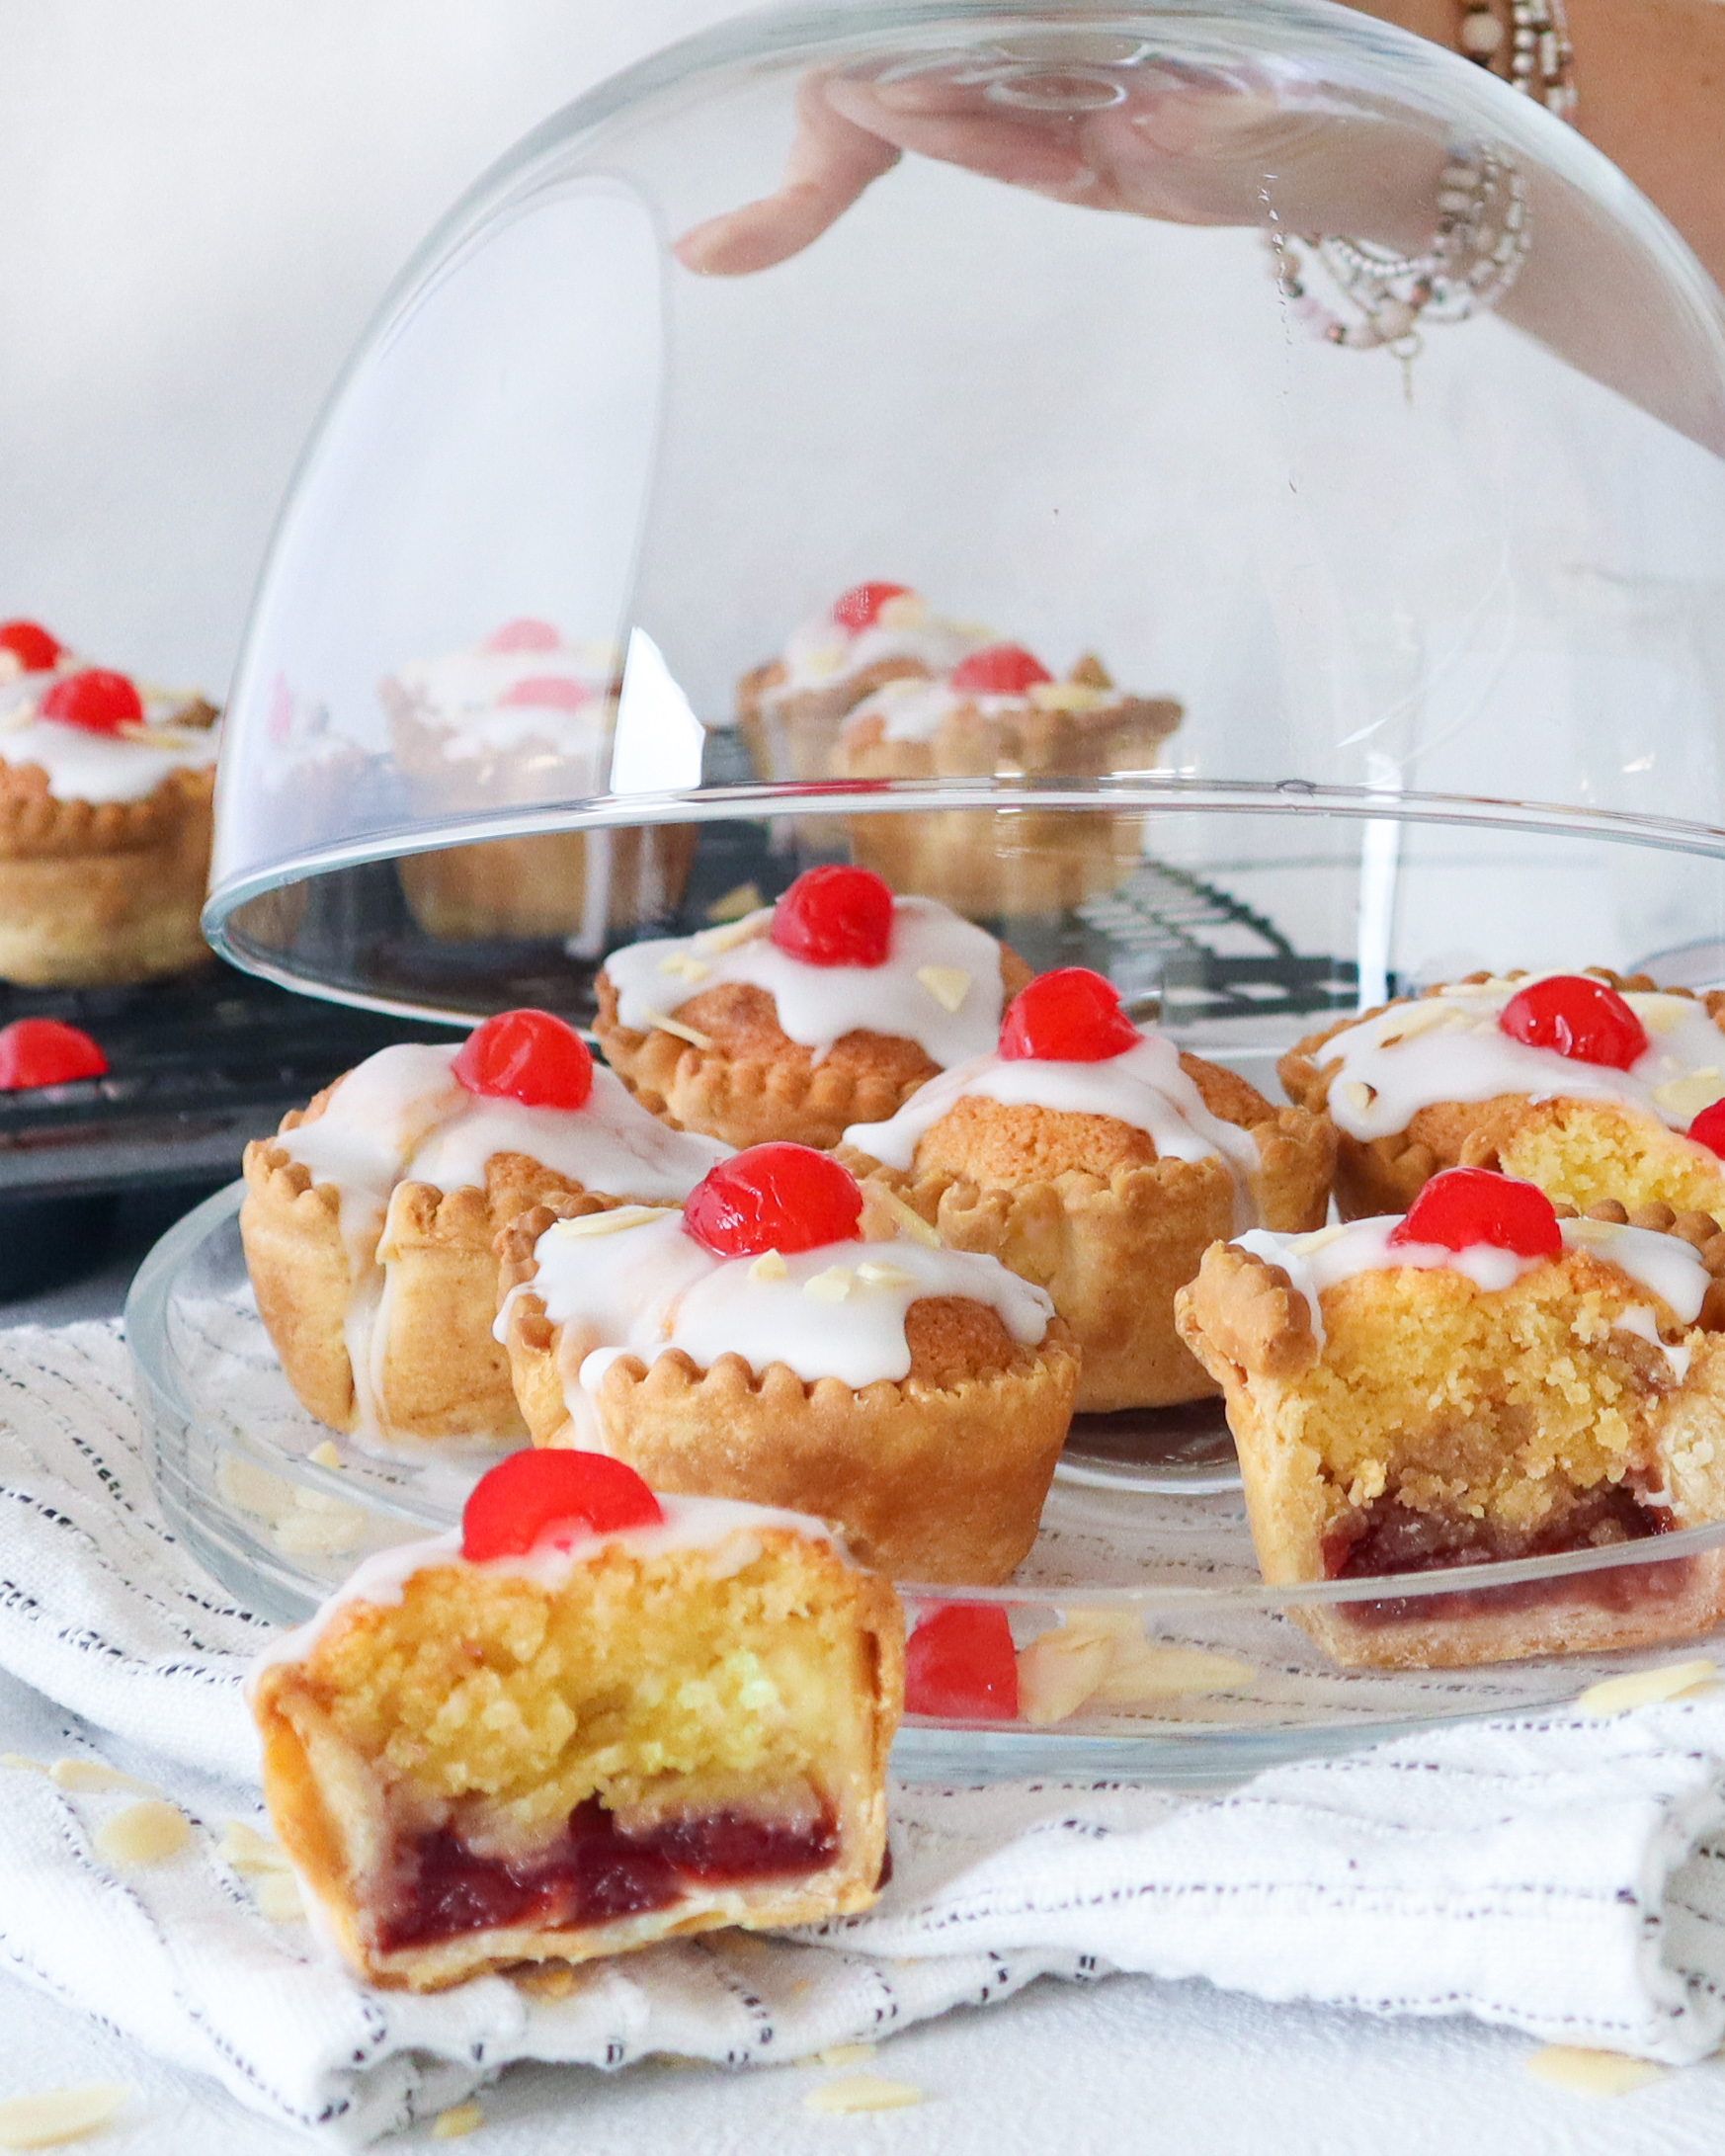
Why did I make Gluten Free Bakewell Tarts? Mr Kipling made me do it. Flaky shortcrust pastry with a thick layer of jam, a light almond sponge and a drizzle of icing. A cherry on top too obviously!!
I was wandering around Sainsburys the other day, totally lost because they’ve moved EVERYTHING to different aisles (why!!!!!) , and ended up in the “normal” cake bit. I saw the Mr Kipling Bakewells and needed one. But the gluten free aisle version doesn’t cut it. So I made my own gluten free Bakewells!!!

What actually is a Bakewell?
Turns out they’re mega simple. You need to:
- (1) make a shortcrust pastry case (shop-bought pastry makes this easy) with a layer of jam in the bottom
- (2) top that with “frangipane” (which is basically just like a regular sponge recipe, you just swap the flour for ground almonds) &
- (3) drizzle over with icing and a cherry on top!

Bit of Info on the Gluten Free Bakewell Ingredients
I think they’re all pretty self explanatory but here’s a few bits I wanted to say:
- Shortcrust pastry:
- What I do: I always buy Genius gluten free shortcrust pastry. You get it in the free from freezer aisle. It works every time, no need to flour the surface and the results seem to be the same as “homemade” so it saves the faff.
- Feel free to make your own though!! I like this recipe from FREEE. You will need to chill the pastry for at least an hour in the fridge before using it. You’ll also need dust the surface with flour when you’re rolling it out as homemade pastry can be a little stickier!
- The recipe: The first section of the recipe is for Genius frozen pastry. If you’ve made your own/found one that is chilled (i.e from the fridge, not the freezer) and is already rolled into thin sheets, skip to the second section.
- Ground almonds – sounds a weird ingredient but you’ll get them in any major supermarket, with the nuts/dried fruit etc. Usually near the baking section.
- Glace/Cocktail cherries – I’m actually not a cherry fan but these just taste like almonds/marizpan so if you’re the same, give them a go haha 🙂 If not, you could top with flaked almonds? Or just drizzle on that icing 😉

Tip for Measuring Your Pastry Circles
Everyone’s muffin/cupcake tin is a slightly different size so its no good me telling you how big to cut out your pastry circles.
My favourite trick for measuring how big you need to cut the circles to fit your tin is to:
- Take a bit of string (or in my case my iphone charger), and run it down the sides and base of the cupcake hole
- Stretch that back out and add on about 1cm to allow for the pastry case to shrink slightly when cooking
- That is the diameter you need the cutter to be!
Hopefully you can sort of see what I mean here:


It doesn’t really matter if its a bit smaller but if its bigger, it’ll be hard to make your pastry cases. It can get a bit fiddly to line the pastry around the holes.

Gluten Free Bakewell Tarts
Ingredients
- 1 x 400 g pack Genius gluten free shortcrust pastry - or make your own version!
- 12 tsp jam (around 70 grams) - its your choice which flavour to use – I like strawberry!
- 140 grams caster sugar
- 140 grams spread/butter + a tiny bit extra for greasing - I use Flora Original (in a tub)
- 140 grams ground almonds - you'll find these with all of the nuts in any major supermarket
- 200 grams icing sugar
- 6 glace cherries
- 2 eggs
Instructions
Follow this section if you're using a block of frozen shortcrust pastry e.g. Genius (if you're using fresh sheets, skip to the next section)
- Take the pastry out of the freezer and place into the fridge 24hrs before you'd like to use it to defrost. If you're feeling impatient, break up the frozen block of pastry into 6 pieces and leave on the side for 2 hours to defrost.
- Need the ball of pastry until it becomes soft and pliable.>I find its best to do this in 6 separate pieces otherwise it makes your hands hurt!
- Roll into a thin sheets – the thinner the better but the absolute maximum is the thickness of a £1 coin.
Make your Pastry Cases
- Pre-heat the oven to 175oC.
- Cut out 12 circles from the pastry sheets. >There's a tip for knowing what size of circles to cut in the blog post above>If you haven't got any circular cutters, you can cut a circle out of a piece of paper and draw around it with a knife.
- Grease your muffin/cupcake tray with butter>Easiest way to do this: rip off a small square of baking paper. Dip it around your tub of butter and then wipe the baking paper over the holes in baking tray.

- Take 1 of the pastry circles. Place into the cupcake tray and carefully press the insides against the baking tray, to make sure it properly forms the shape. >Don't worry if you tear the pastry, just use your fingers to mould it back together again! Its like blue tack – you can be quite heavy handed with it. >If you don't push it right to the bottom of the baking tray and around the edges, there won't be as much room for that yummy filling!!
- Take a fork and gently make holes in the bottom of the pastry case and then a couple at the sides. >This is to prevent the pastry from puffing up too much and creating bubbles. It also means you haven't got to faff around with baking beads/blind baking etc!
- Repeat for all of the pastry cases and then place into the oven for 10 mins.

Prepare the filling
- Whilst that is in the oven, whisk the butter and sugar until fully incorporated. >Everyone has a tendency to under whisk at this stage. Make sure you're whisking for at least 3 mins, until the butter has gone light and fluffy.
- Add the two eggs and whisk in at a low speed.>Don't worry if the mix curdles slightly… the next step will sort that out!
- Add the ground almonds and whisk until just incorporated. >Make sure you scrape around the outsides and to the bottom of the bowl to get everything mixed together evenly>It'll look something like this picture – ie. slightly grainy cake mix! Sorry about the quality of the pic… had to steal it from a video so its a funny angle!!

Make your Bakewells!
- Once the 10 mins is up, remove your pastry cases from the oven. Add 1 level tsp of jam to the bottom of each. Spread it around so there is an even coating on the base. >Feel free to add more jam, but just know it might rise a little through the cake mix and you won't get the perfect line between jam and sponge when you cut into it.

- Add 1 heaped tbsp of the cake mix on top of each. >The mix will not rise dramatically, so you can fill each of your cases to the top.

- Return the bakewells to the oven for 15-18 mins, or until just browning and springy to touch, but not wet looking. You'll know exactly what I mean when you're doing it!>They'll look something like this!

- Remove the bakewells from the oven and allow them to cool completely before heading to the next step…
- Mix the icing sugar with a tiny, tiny amount of water.
- Add a spoonful of icing to each bakewell. Chop the cherries into halves and add to the tops.
- Eat!!!


1 Comments
Phil
15th January 2021 at 6:06 pm
Just tried this recipe, it’s the easiest cherry Bakewell tart recipe I’ve tried and it’s brilliant ?